Tool Comparison & Selection
Which AI tools really improve photo quality?

TL;DR
- The best AI tool depends on whether you need faithful cleanup, bigger print size, better faces, or the fastest browser workflow.
- Topaz Photo AI is the safest serious pick when the file itself is weak and you care about believable detail.
- Adobe Super Resolution is the easiest practical choice if you already work in Lightroom or Camera Raw.
- Remini is strong for portraits and old family faces, but it can push too far.
- Upscayl is the best free local option if privacy and budget matter more than polish, while PhotoSharpener is an easy browser starting point for one everyday photo.
If you are asking which AI tools really improve photo quality, you are probably trying to avoid a familiar disappointment. A lot of tools make a photo look sharper in a tiny preview, but once you zoom in, the result falls apart. Skin looks waxy, text gets thicker without becoming clearer, and faces start looking less like the same person.
So the useful question is not "which tool has the most AI." It is which tool improves the photo in a way that still holds up at full size and still matches the job you need done.
That is why the best answer usually depends on the source file. A weak phone portrait, a low-resolution product image, an old family print, and a cropped wildlife shot do not need the same workflow. If you already read what are the best online image enhancers, this guide goes one step further and focuses on which tools actually produce a better image, not just a flashier one.
What counts as a real photo quality improvement?
Better detail should still look believable
A real improvement makes the photo easier to use without changing its character too much. Edges look cleaner, compression damage is reduced, faces stay recognizable, and the enlarged file gives you more usable output for sharing or printing.
That is different from aggressive enhancement. Some tools add punch quickly, but the detail is not stable. Hair becomes painted, pores look stamped on, and hard edges get halos around them. The image looks "more processed" instead of simply better.
If truth matters, the best result is usually a modest but believable improvement. That is the same reason we recommend realistic expectations in can you upscale an image without quality loss. AI can often make a photo cleaner and larger, but it still cannot recover every missing pixel honestly.
Start by identifying the actual problem
Before choosing a tool, ask what is wrong with the image:
- Is it mainly too small?
- Is it soft or slightly blurry?
- Is it noisy or heavily compressed?
- Is the face the most important part?
- Do you need browser convenience, or do you need local control?
Those questions matter because a good portrait tool is not always the best print tool, and a good upscaler is not always the best face restorer. Matching the tool to the problem saves more time than chasing "best overall."
Quick comparison of the tools that actually help
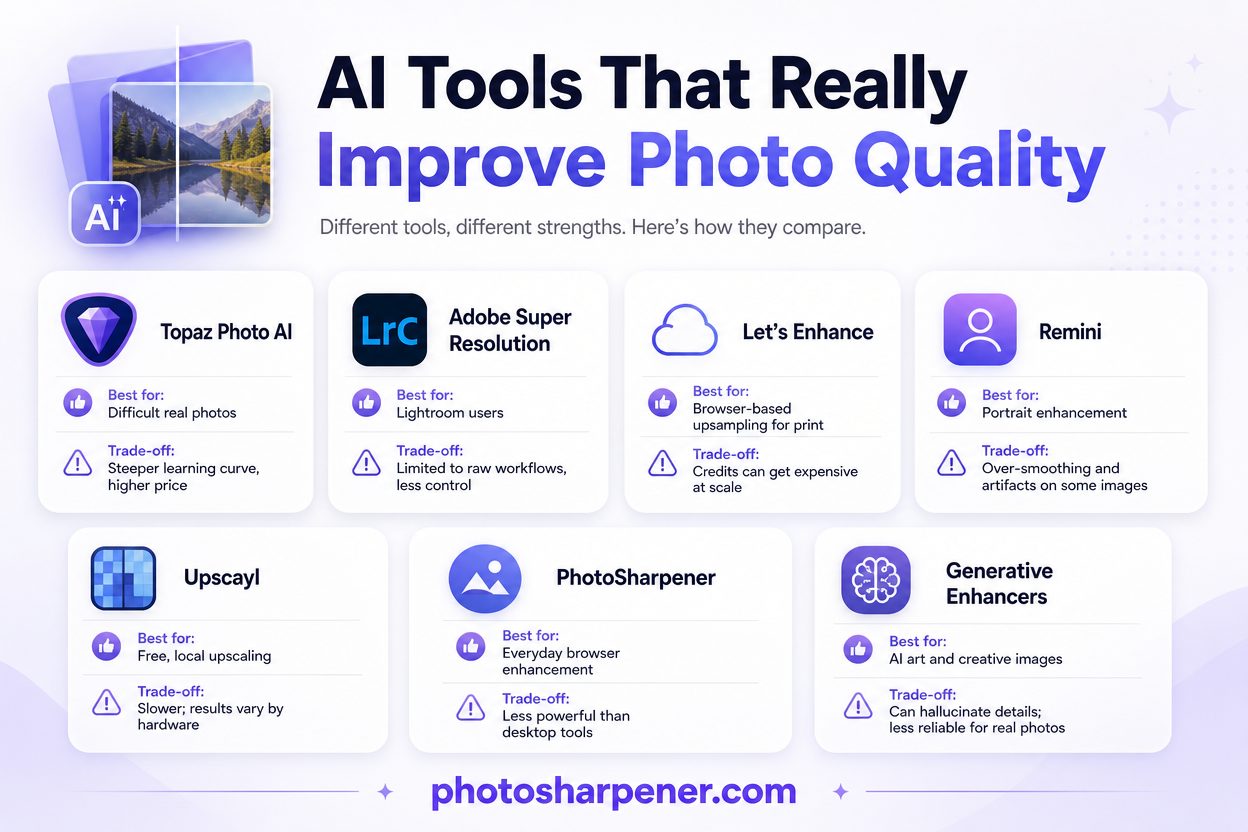
Here is the short version for the tools and tool types that keep proving useful in current comparisons:
| Tool | Best for | Why it helps | Main trade-off |
|---|---|---|---|
| Topaz Photo AI | Weak real photos, print prep, difficult files | Combines sharpening, denoise, and upscale in one quality-focused workflow | Paid desktop app and local processing can be slow on older hardware |
| Adobe Super Resolution | Lightroom and Camera Raw users | Easy enlargement inside an existing photo workflow | Less specialized on badly degraded files |
| Let's Enhance | Browser-based print and product workflows | Convenient web process when you need cleanup and more pixels together | Credit pricing and less control than desktop tools |
| Remini | Portraits and old family faces | Very fast face-focused recovery on weak portraits | Can overprocess skin and identity details |
| Upscayl | Free, private, offline upscaling | Runs locally and costs nothing | Hard files still look better in stronger paid tools |
| Simple browser tools like PhotoSharpener | One-off everyday cleanup | Fast path for sharpening, upscaling, and light restoration without setup | Less manual control than a desktop editing stack |
| Generative enhancers like Magnific-style tools | AI art and stylized creative work | Strong at inventing texture for dramatic output | Risky for real people, text, and faithful photo recovery |
That table covers most real decisions. The rest of the article is about when each option earns its place and when it does not.
Topaz Photo AI is the safest serious choice for difficult real photos
It handles several quality problems in one pass
Topaz keeps coming up in current comparisons for a practical reason. It is not just an upscaler. It is usually the tool people reach for when the image has several problems at once, such as softness, noise, and too few pixels.
That makes it a strong fit when you have:
- an old scan that needs to print better
- a wildlife or event photo with distant face detail
- a product shot that is too small for cleaner delivery
- a cropped image that still has enough structure to rebuild
It is one of the safer choices when you want the final image to stay close to the original photo instead of turning into an AI interpretation.
It is strongest when fidelity matters more than convenience
Topaz makes the most sense if the file is important and you are willing to spend a little more time checking the output carefully. That is especially true for print use, client work, or emotionally important family photos.
It is less ideal if you only need a fast browser result or if you do not want local processing at all. It also does not replace a full editor. If you need masking, color work, or local retouching, you still need another tool around it.
So think of Topaz as the best "quality rescue" option for many real photos, not the best answer for every casual job.
Adobe Super Resolution is the easiest practical choice for Adobe users
It fits naturally into an existing workflow
If you already edit in Lightroom or Camera Raw, Adobe is often the most practical tool to try first. You do not need a separate export loop, and you do not need to learn a new interface just to test whether enlargement helps.
That is valuable when:
- you already pay for Adobe
- the source file is decent and mostly needs more pixels
- you want a conservative result
- you need the output to stay inside a familiar catalog workflow
For many photographers, that workflow advantage matters just as much as raw image quality. A slightly less specialized tool can still be the right choice if it saves several unnecessary steps.
It is better for solid files than severely damaged ones
Adobe works best when the original image is already reasonably healthy. If the file is severely compressed, visibly damaged, or needs stronger face recovery, a specialist still tends to do better.
So if your thought is "I already have Lightroom open," start there. If your thought is "this old photo is in rough shape and I need the cleanest rescue I can get," move to a stronger specialist.
Browser-based enhancers work when simplicity matters more than control
Let's Enhance is useful for print-minded web workflows
Some people do not want to install anything, and some teams do not want their workflow tied to one computer. That is where browser-based enhancers still make sense.
Let's Enhance is one of the more practical web options because it combines enlargement with cleanup in a workflow that makes sense for product images, simple print preparation, and repeat browser use. It is often a good fit when:
- you need a cleaner product or catalog image
- you want to make a small file more usable for modest print
- you prefer web convenience over desktop setup
- several people need the same lightweight workflow
The trade-off is the usual browser trade-off: less control, upload dependency, and pricing that can feel fine for occasional work but annoying at scale.
A simple browser workflow is often enough for one real-life photo
A lot of readers are not building a production pipeline. They have one old print, one small listing image, one blurry family photo, or one profile picture that needs to look better quickly.
For that kind of task, a simple browser tool can be the right answer because fewer decisions usually means fewer mistakes. A workflow like PhotoSharpener fits naturally when the image needs more clarity, a modest upscale, or optional face-aware recovery without turning the job into a full editing project.
That does not make browser tools "better" than desktop tools. It means they are often better matched to beginner behavior, which is just as important.
Remini helps most when the face is the whole point
Portraits often respond well to face-first enhancement
Remini remains one of the first tools worth trying when the real value of the image is in the face. That is why it keeps showing up in current roundups for:
- old family portraits
- selfies and profile pictures
- memorial photos
- phone photos where the face is small but important
If your main question is "can I make this person look clearer," Remini often gives a stronger first impression than a general-purpose enhancer.
It can solve the wrong problem by pushing too hard
The problem is that stronger face enhancement can drift into face replacement. Eyes may look cleaner but less natural. Skin can become too smooth. Features can feel a little off even when the result looks sharper.
That is why you should judge the result at full size and not only by the before-and-after slider. If the person looks polished but no longer looks quite like themselves, the tool went too far. That same overprocessed look is closely related to the waxy result explained in why does noise reduction make faces waxy, and avoid it?.
Use Remini when the face is the priority. Do not assume it is the best all-purpose quality tool for every kind of photo.
Upscayl is the best free option if you want privacy and zero cost
Free is finally good enough for some real jobs
Most free enhancers are fine for demos and weak for serious use. Upscayl is the main exception people keep coming back to because it runs locally, costs nothing, and is still capable enough to help on genuine photos.
It makes sense when:
- budget is the biggest constraint
- you do not want to upload personal photos
- the file mainly needs enlargement
- you are comfortable using a desktop app
For normal photos that are already decent and just too small, it can be surprisingly useful.
The limits show up on faces and fragile files
Free does not mean equal. Hard portraits, tiny text, and heavily damaged originals are still where better paid tools pull ahead.
So use Upscayl as the smart first free test, especially when privacy matters. Just do not expect it to beat stronger paid tools on emotionally important or print-critical images.
Generative enhancers help some images and hurt others
They are strongest when realism is not the goal
Some of the most dramatic AI enhancers are really creative reconstruction tools. They do not just clean the image. They invent texture that was not clearly present in the source.
That can work very well for:
- AI-generated art
- stylized illustrations
- concept images
- dramatic marketing visuals
If the goal is impact rather than fidelity, that extra invention may be exactly what you want.
They are risky for family photos, products, and text
The same behavior becomes a liability when the photo needs to stay honest. A family face can subtly change. Product texture can stop matching the real item. Text can look bolder without becoming readable.
So if the image needs to remain trustworthy, treat generative enhancers carefully. When truth matters, faithful cleanup beats theatrical detail almost every time.
How to choose the right tool in two minutes
Use this decision checklist
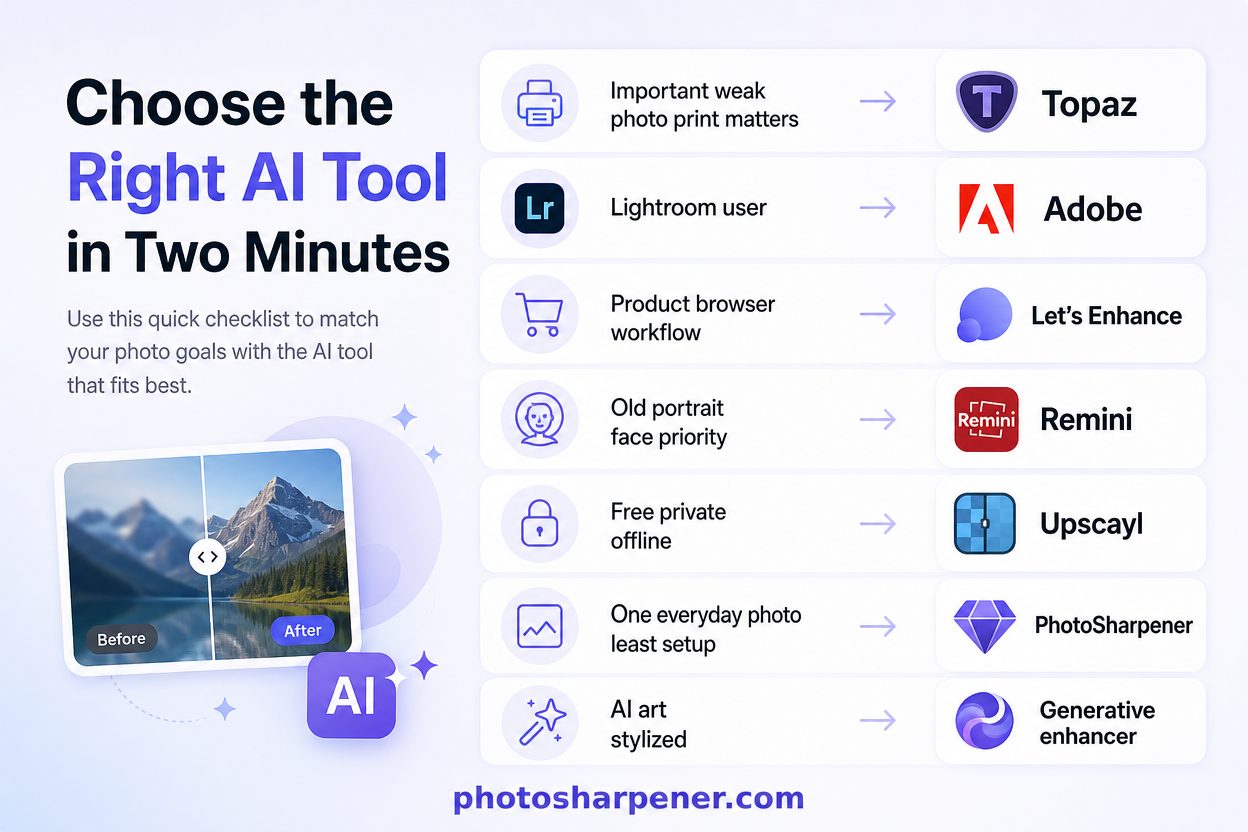
If you want a simple starting point, use this:
| If your situation is... | Start here |
|---|---|
| Important real photo, weak source, print matters | Topaz Photo AI |
| Already editing in Lightroom or Camera Raw | Adobe Super Resolution |
| Product image or browser-first print workflow | Let's Enhance |
| Old family portrait where the face matters most | Remini |
| Free, private, offline enlargement | Upscayl |
| One everyday photo and you want the least setup | A simple browser tool like PhotoSharpener |
| AI art or stylized design output | Generative enhancer |
This works better than looking for one universal winner because it matches the tool to the actual job.
Test one representative image before paying
Do not test with your easiest image. Test with the image that represents the hardest real case you care about.
Good test files include:
- a portrait with visible eyes and skin texture
- a product image with edges and text
- an old scan with mild damage
- a small photo you genuinely want to print
If a tool handles that file well, it is far more likely to justify the money or the workflow.
How to tell whether the tool really improved your photo
Check the result at 100% zoom
Never choose a tool based only on the fit-to-screen preview. Almost every enhancer looks better when the image is small.
Zoom in and inspect:
- eyes and eyelashes
- hairlines
- text and logos
- hard contrast edges
- skin and fabric texture
- flat backgrounds where artifacts are easy to spot
If those areas look cleaner and still believable, the tool is doing real work.
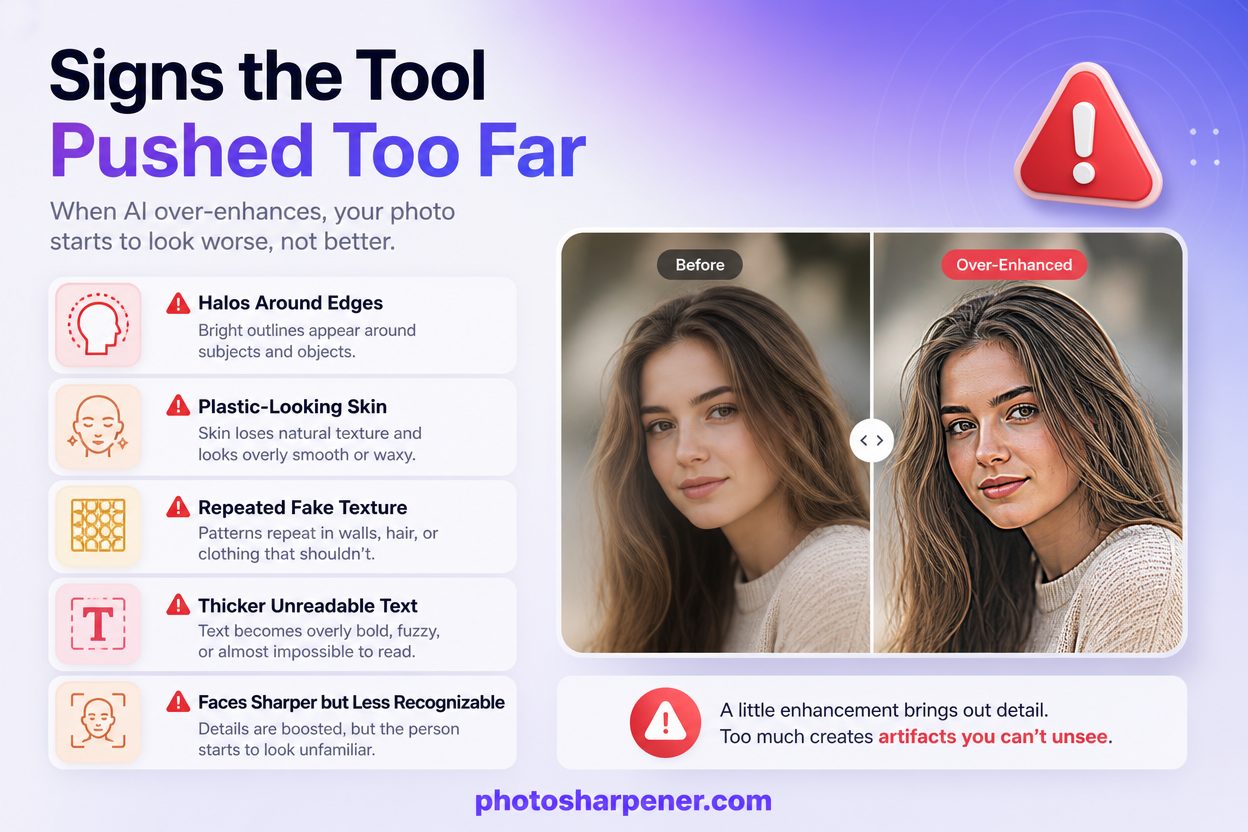
Watch for the common failure signs
Back off if you notice:
- halos around edges
- skin that looks plastic
- repeated fake texture
- thicker text that is still hard to read
- faces that look sharper but less like the same person
A believable 2x improvement is usually more useful than a strange 4x result. If your next step is printing, pair that review with what resolution is needed to print an AI-upscaled photo so you do not enlarge more than the final output actually needs.
FAQ
Which AI tool is best for improving overall photo quality?
For many serious real-photo jobs, Topaz Photo AI is one of the safest overall choices because it handles sharpening, denoise, and upscaling together while staying relatively believable. But the best answer still depends on whether you care most about faces, print size, budget, or workflow speed.
Which AI tool is best for portraits?
Remini is often the strongest first test for portraits and old family faces because it is so face-focused. Just make sure the person still looks natural and recognizable at full size.
Which AI tool is best if I do not want to pay?
Upscayl is the best free starting point for many people because it runs locally, avoids uploads, and can produce useful results on ordinary photos. It is most convincing when the image mainly needs enlargement rather than delicate face recovery.
Are browser-based AI enhancers actually good now?
Yes, for many everyday jobs. They are especially useful when you need one quick cleanup, a modest upscale, or a simple product image workflow. Desktop tools still have the edge when you need the best fidelity, more control, or private local processing.
Should I sharpen first or upscale first?
If the image is mainly soft, improve clarity first. If the main problem is size, upscale carefully and then evaluate whether extra sharpening is still needed. When the file has both problems, an integrated workflow can help. Our guide on best tools to upscale low-resolution images can help you choose that path.