Tool Comparison & Selection
What are the best online image enhancers?

TL;DR
- The best online image enhancer depends on whether you care most about faces, print size, product consistency, or pure convenience.
- Let's Enhance is one of the strongest browser choices when you want cleaner detail and print-oriented output.
- Remini is still hard to beat for quick face-focused improvement, especially on portraits and old family photos.
- VanceAI is useful when you want several web tools in one place, while PhotoSharpener is the easier fit for one everyday photo.
- If privacy, RAW files, or strict fidelity matter most, an online tool may not be the best answer.
If you are asking what are the best online image enhancers, you are usually not looking for a long list of random apps. You want to know which tool fits your photo, what trade-offs come with each option, and when a browser workflow is actually good enough.
That matters because "image enhancer" now covers several different jobs at once. Some tools focus on portraits and face recovery. Some are better for product photos and repeatable catalog work. Some are designed to make a weak image look bigger and cleaner for print. Others look impressive in a preview but drift too far from the original photo.
So the best way to compare them is not by hype. It is by use case, workflow friction, and how believable the final result looks at full size. If you already read our guide on best tools to upscale low-resolution images, this article narrows the field to online enhancers specifically.
What makes an online image enhancer worth using?
A good enhancer improves detail without rewriting the photo
The strongest browser tools do more than add a sharpen filter. They reduce compression damage, rebuild cleaner edges, and make small details easier to read while keeping the image recognizable.
That is the real test. A result can look dramatic in a thumbnail and still fail once you zoom in. If skin turns plastic, text grows thicker without becoming clearer, or a face starts looking like a different person, the tool pushed too hard.
This is why comparison pages keep returning to the same criteria:
- believable detail
- artifact control
- ease of use
- pricing model
- print readiness
- how well the tool matches the source image
If your main concern is realism, a moderate improvement is usually better than an aggressive one. The same rule applies in our guide on can you upscale an image without quality loss: the safest enhancer is the one that gives you a cleaner version of the same photo, not a flashy reinterpretation.
Match the tool to the job, not the prettiest preview
Most people get better results when they answer three questions before choosing any tool:
- Is this a real photo, a product image, a screenshot, or AI art?
- Do I need a fast browser workflow, or do I care more about control and privacy?
- Is the problem blur, low resolution, noise, or a mix of all three?
Those questions matter because one tool can be excellent for old family portraits and only average for ecommerce listings. Another can be perfect for browser-based batch work and a poor fit for face recovery.
Quick comparison of the best online image enhancers
Here is the short version for the browser tools and adjacent options that come up most often in current comparisons:
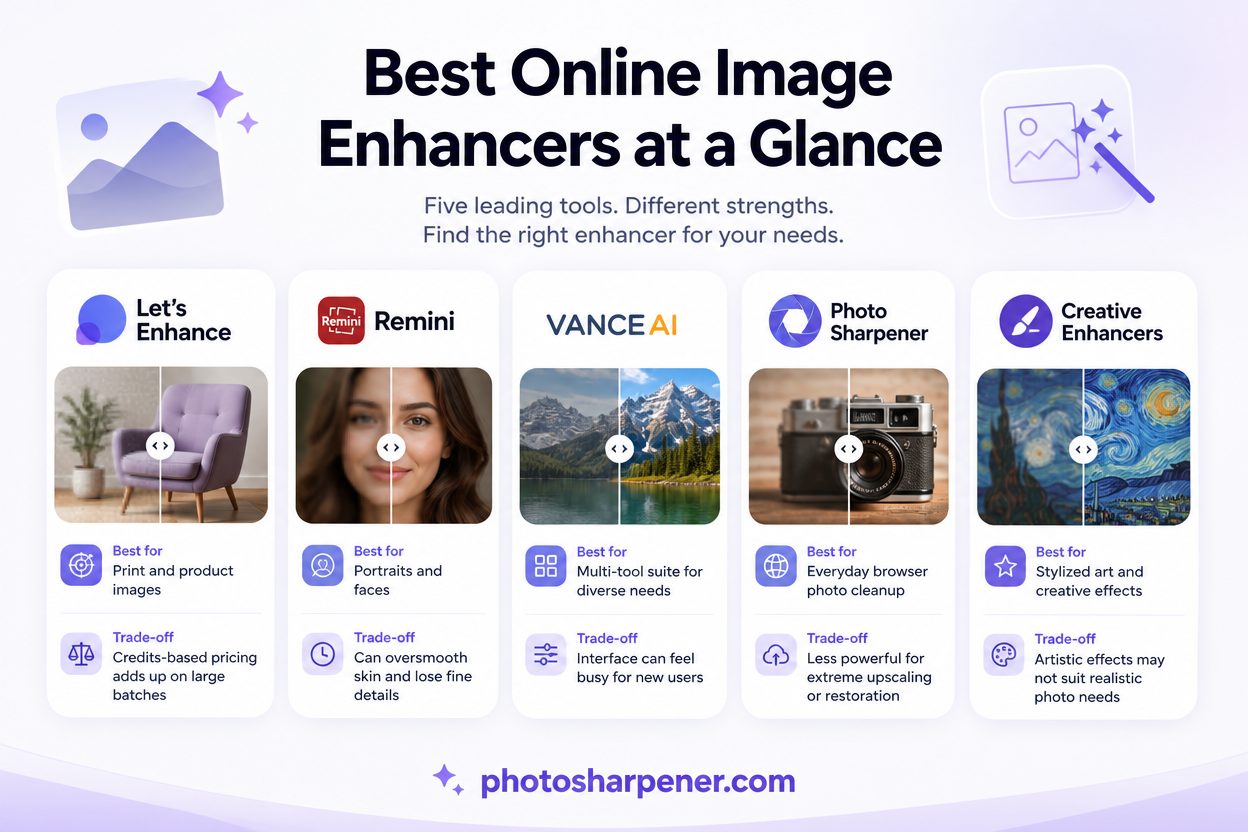
| Tool | Best for | Why people choose it | Main trade-off |
|---|---|---|---|
| Let's Enhance | Print-minded browser workflows, product photos, general web use | Strong web workflow, good detail recovery, output built around resizing and enhancement together | Credit pricing can add up |
| Remini | Portraits, selfies, old family faces | Fast face-focused enhancement and simple mobile-to-web workflow | Can overprocess skin and texture |
| VanceAI | Users who want several image tools in one account | Broad suite with upscale, sharpen, denoise, and restoration utilities | Quality can feel less consistent on close facial detail |
| PhotoSharpener | Everyday one-off photo cleanup in the browser | Simple workflow for sharpening, upscaling, and optional face restoration | Less manual control than a desktop editing stack |
| Browser-only creative enhancers | Stylized art and dramatic texture | Fast, eye-catching results | Easy to drift away from the original photo |
That table covers most real decisions. If you mainly want a browser tool for honest photo cleanup, start with the first four rows and treat creative enhancers as a separate category.
Let's Enhance is strongest for print-minded browser workflows
Why it stands out for general online use
Let's Enhance keeps showing up in comparison roundups for a practical reason: it handles the most common browser workflow well. You upload an image, choose a model, and get sharpening, cleanup, and enlargement in the same process without moving into a desktop editor.
That makes it a strong fit when you have:
- a product photo that needs cleaner edges
- a small image that needs to print better
- an older scan that is soft but still readable
- a browser-first workflow where you do not want to install anything
Its strongest advantage is that it feels built around output, not just enhancement theater. If you need more pixels and cleaner detail in one step, the workflow makes sense quickly.
When it is not the best fit
It is still not the default answer for every image.
If your file is a portrait where identity matters more than everything else, a face-focused tool can sometimes do better. If you process very large volumes, credit pricing may become annoying. And if privacy is the first priority, any upload-based workflow has an obvious limit.
So think of Let's Enhance as one of the safest all-around browser choices, not the universal winner for every source file.
PhotoSharpener is a strong choice for quick everyday photo cleanup
Where a simple browser workflow helps most
A lot of readers asking this question are not comparing ten services for a production pipeline. They have one blurry family photo, one profile image, one small listing photo, or one old scan that needs to look better fast.
For that kind of job, simplicity matters. A browser tool that combines sharpening, upscaling, and optional face-aware recovery in one place is often easier than moving through several separate apps or learning a full retouching workflow.
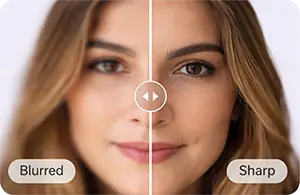
That is where PhotoSharpener fits naturally. It is useful when the image is small, a little soft, lightly compressed, or not quite clean enough for sharing or modest print use. The workflow stays beginner-friendly, which matters when the goal is "make this usable" rather than "build a studio-grade editing pipeline."
When it makes sense to use it first
PhotoSharpener makes the most sense when:
- you want a browser-only workflow
- the file needs both more clarity and more pixels
- the image is an everyday photo, scan, or product shot
- you want to test one image quickly before committing to a more involved tool
If the source file is already heavily damaged, or if you need very precise local adjustments, that is where a full editor or a desktop specialist can still pull ahead.
Remini is best when faces matter more than everything else
Why portraits often respond well
Remini built its reputation on one thing: making weak faces look much better, very quickly.
That is why it keeps appearing in current roundups for:
- blurry portraits
- old family photos
- selfies and profile pictures
- phone-first users who want a fast result
If the emotional value of the image lives in the face, Remini is often one of the first tools worth testing. It can recover eyes, mouth edges, and general facial readability better than broad utility enhancers on many low-quality portraits.
Where it can go too far
The trade-off is that face-first enhancement can become too aggressive. Skin can look too smooth, small textures can disappear, and non-face areas can start feeling synthetic.
That is the same warning behind our article on why noise reduction makes faces waxy, and avoid it?. If the face looks polished but no longer looks real, the tool solved the wrong problem.
Use Remini when the face is the priority. Avoid treating it as the best all-purpose enhancer for every image type.
VanceAI works best if you want several web tools in one account
Breadth matters for mixed image tasks
VanceAI is often recommended less because it wins every head-to-head test, and more because it covers a lot of jobs in one place. That matters if your workflow shifts between sharpening, denoising, restoring, background cleanup, and enlargement.
This kind of toolkit can be useful for:
- mixed marketing assets
- marketplace or listing images
- users who want one subscription to handle multiple small jobs
- teams that care more about convenience than model-level tweaking
If your image problems are varied, a broader suite can be more practical than chasing one specialist for every task.
The trade-off is consistency on hard files
Broad utility is not the same as best-in-class output. On difficult portraits or images where you care about fine facial detail, multi-tool suites often lag behind stronger specialists.
So VanceAI is a practical choice when you want flexibility. It is a weaker choice when you want the most believable face recovery or the safest print-quality result from a fragile photo.
Online enhancers are not always the best answer
Use desktop tools when privacy or RAW files matter most
This is where a lot of comparison articles quietly agree: sometimes the best online image enhancer is no online tool at all.
If you are working with:
- RAW camera files
- client images that should stay local
- very high-volume batches
- large print jobs where you want more control
then a desktop option can make more sense. Tools like Topaz Photo AI or even a free local option like Upscayl are often recommended in those situations because they avoid uploads and give you a little more control over the process.
If you mostly need enlargement rather than browser convenience, our guide on best tools to upscale low-resolution images is the better comparison.
Do not confuse faithful repair with creative invention
Some enhancers are really creative upscalers in disguise. They invent texture, sharpen aggressively, and make the result look more dramatic than true.
That can be fine for:
- AI art
- stylized design work
- concept images
- social visuals where realism is not the goal
But it is risky for real people, archival photos, and product images. If the job is preserving a photo, prioritize believable recovery over wow-factor previews.
How to choose the right online enhancer in two minutes
Use this decision checklist
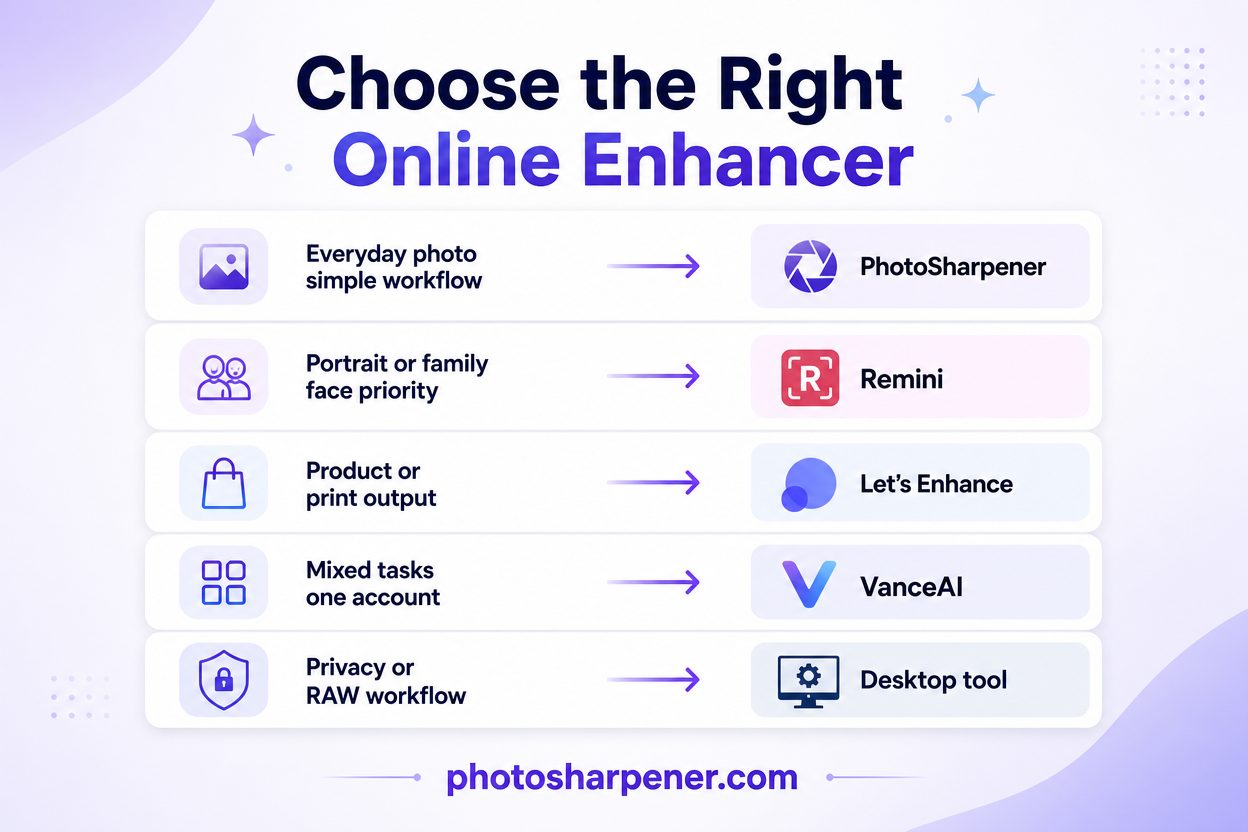
If you want a fast answer, use this:
| If your situation is... | Start here |
|---|---|
| One everyday photo, simple browser workflow | PhotoSharpener |
| Portrait or old family face is the main priority | Remini |
| Product photo or print-minded browser output | Let's Enhance |
| Mixed image tasks under one web account | VanceAI |
| Privacy or RAW workflow matters more than convenience | Desktop tool instead |
This works better than chasing "best overall" because it matches the tool to the job you actually have.
Start with one representative image
Before paying for any service, test one image that reflects your hardest real case, not your easiest one.
A good test image might be:
- a portrait with visible eyes and skin texture
- a small product image with clean edges and text
- an old scan with mild damage and compression
- a low-res photo you actually want to print
If a tool handles that image well, it is far more likely to handle the rest of your project well too.
How to judge the result before you pay
What to inspect at 100% zoom
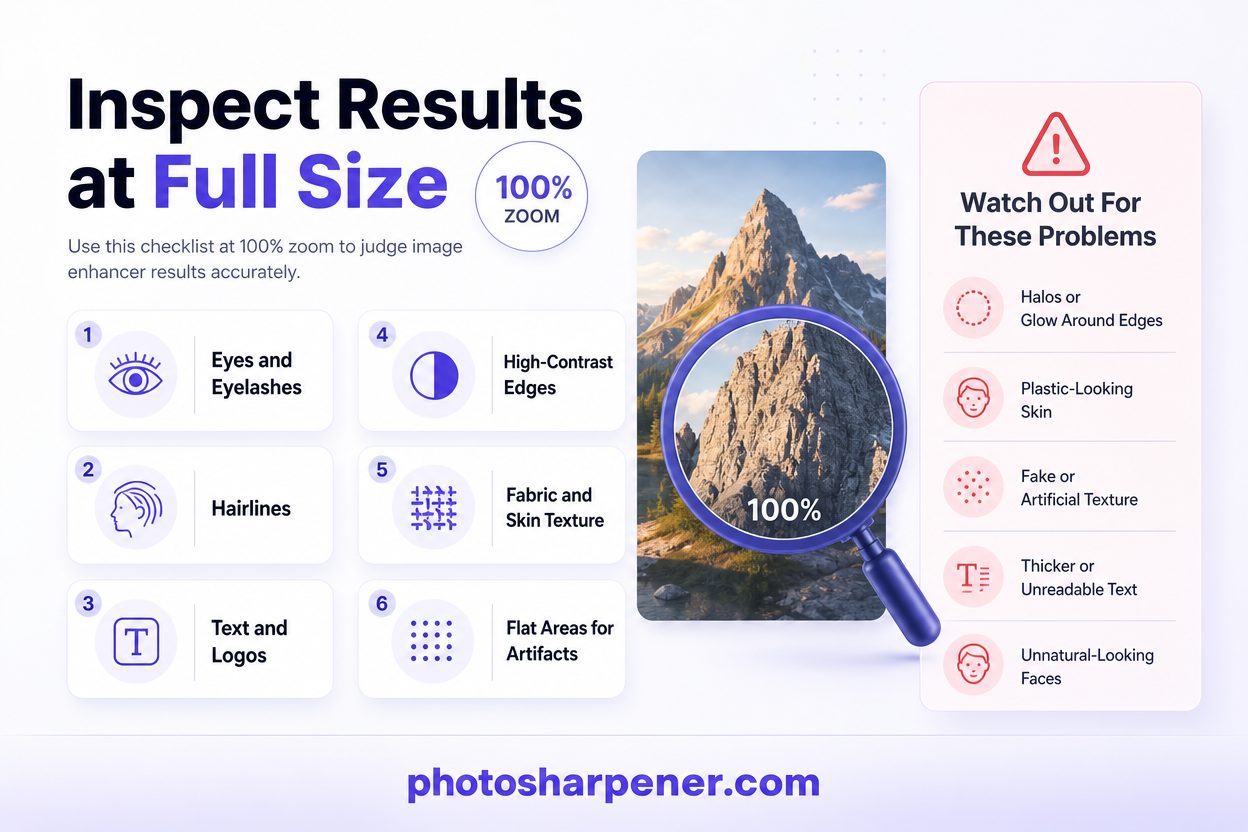
Never choose an enhancer based only on the fit-to-screen preview.
Zoom in and check:
- eyes and eyelashes
- hairlines
- text and logos
- high-contrast edges
- fabric and skin texture
- flat areas where artifacts become obvious
If those details look cleaner and still believable, the enhancer is probably doing its job.
Signs the enhancer pushed too far
Back off if you see:
- halos around edges
- plastic-looking skin
- fake repeated texture
- text that looks thicker but not more readable
- faces that look sharper but somehow less like the same person
A believable 2x improvement is usually better than a strange-looking 4x result. If your end goal is printing, pair this step with our guide on what resolution is needed to print an AI-upscaled photo so you do not enlarge further than you need.
FAQ
What is the best online image enhancer for most people?
For many users, Let's Enhance is one of the safest all-around browser choices because it handles sharpening, cleanup, and enlargement in a straightforward web workflow. But the best choice still depends on whether your image is a portrait, product shot, old scan, or general everyday photo.
What is the best online image enhancer for portraits?
Remini is often the best first test for portraits and old family faces because it is built around face-focused enhancement. Just make sure the result still looks natural at full size.
Are online image enhancers good enough for printing?
Often, yes, for mild to moderate enhancement jobs. They work best when the source image is already close to usable and you need a cleaner, larger version. If the source is badly damaged or the print is large, desktop tools can offer more control.
Should I sharpen or upscale first?
Usually fix clarity first, then upscale only if you still need more pixels. If you enlarge a weak image too early, you often end up with a bigger version of the same softness.
What if I only need to fix one photo quickly?
Start with the simplest browser workflow that matches the problem. For an everyday image that needs sharpening, cleanup, or a modest upscale, a tool like PhotoSharpener is often the fastest practical option.
Affiner · Agrandir · Restaurer
Détail réel reconstruit en ~8 s. Jusqu’à 4× d’agrandissement.