AI Sharpening Basics
When should you sharpen a photo instead of upscaling?
TL;DR
- Sharpen instead of upscaling when the photo is already big enough for its final use and only looks a little soft.
- Upscale instead when the file is too small for print, cropping, zoom, or larger display.
- If the image is both small and soft, the safe order is usually clean noise first, upscale next, sharpen last.
- Judge the result at 100% zoom, not just fit-to-screen, because halos and fake detail hide in small previews.
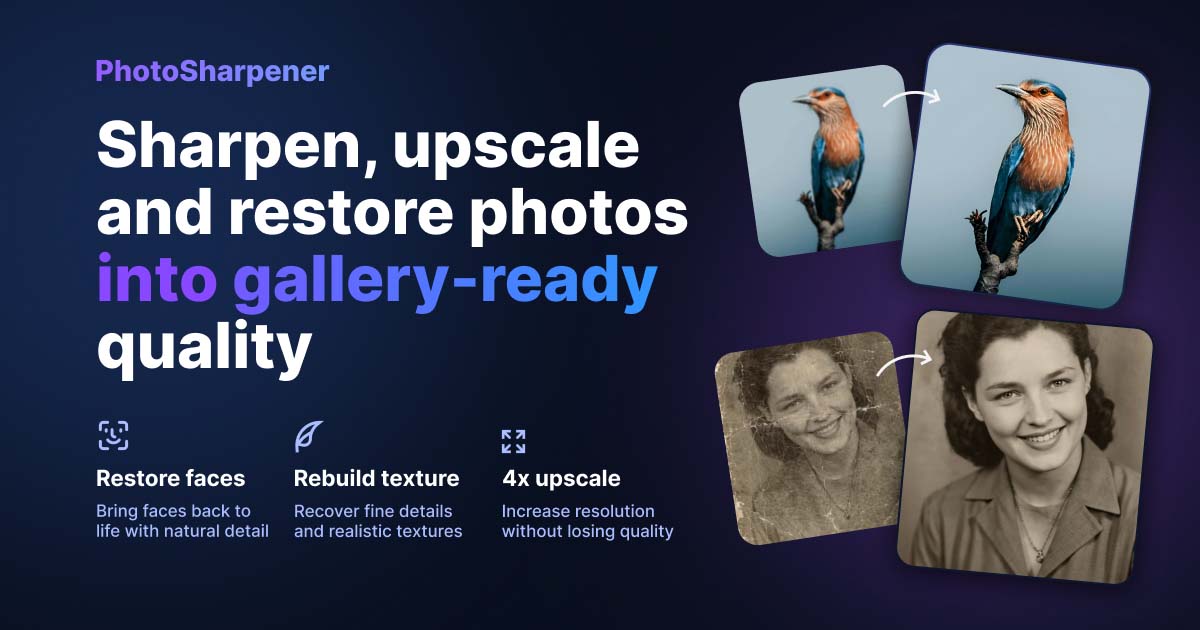
- PhotoSharpener is a simple browser option when you want upscaling, cleanup, and natural-looking sharpening in one workflow.
When should you sharpen a photo instead of upscaling? Use sharpening when the image already has enough pixels for the job and just needs a clearer finish. Use upscaling when the file is too small for the output you want. That sounds simple, but it matters more than most people expect because using the wrong tool first is how photos end up crunchy, fake, or still not usable.
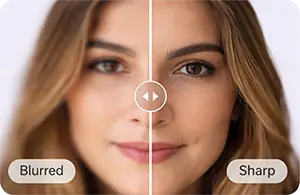
This confusion happens because both tools can make a preview look "better" at first glance. A sharpen filter boosts edge contrast inside the pixels you already have. Upscaling makes the file larger and tries to rebuild plausible detail for that larger size. Those are different jobs, so the first step should always come from the real problem in the file.
Diagnose the real problem before you edit
Check whether the file is too small or just too soft
Before you touch any sliders, check the pixel dimensions and the final use. If the image needs to become a larger print, a tighter crop, or a bigger on-screen asset, size is part of the problem. In that case, sharpening alone will not get you there because it cannot add real resolution.
If the file is already large enough and just looks slightly dull, scanner-soft, or a little flat around edges, sharpening is often the better first move. You are not trying to create a bigger file. You are trying to make existing detail read more clearly.
This quick table helps:
| What you see | Main problem | Better first move |
|---|---|---|
| File falls apart when enlarged | Too few pixels | Upscale |
| File is large enough but looks slightly soft | Mild softness | Sharpen |
| Grain, JPEG blocks, or rough texture | Noise or compression | Clean artifacts first |
| Severe blur or missed focus | Missing structure | Manage expectations, then test deblur or AI carefully |
Look for noise, compression, and missed focus
Some images look soft for more than one reason. A messaging app download may be small, compressed, and slightly blurry at the same time. An old scan might have enough dimensions on paper, but the actual detail is weak because the scan is noisy or washed out.
That matters because sharpening treats noise like detail. If a photo already has grain, JPEG blocks, or rough skin texture, a heavy sharpen pass makes those flaws louder. If the image is truly out of focus, sharpening can make it look harsher without making it clearer. So when people ask whether to sharpen or upscale, the better question is often: what is the dominant weakness in this file right now?
When sharpening is the better tool
Full-size photos that only need more edge definition
Sharpening is the right choice when the photo is already large enough for the final job and the detail mostly exists. Common examples include:
- a scan that looks slightly soft but has decent dimensions
- a phone photo that lost some snap after export
- a product image that needs cleaner edges
- text or interface screenshots that are readable but not crisp
In those cases, sharpening works because it enhances local contrast around edges. Adobe's explanation of Unsharp Mask makes the core idea clear: sharpening creates the impression of stronger detail, but it does not create new pixels.
That makes sharpening a good fit when you want a believable improvement that stays close to the source. It is often faster, lighter, and more predictable than upscaling an image that does not actually need more size.
Final output after resizing or export
Sharpening is also the right finishing step after the image reaches its final size. This is one of the most consistent patterns across editing guides and real workflows: resize first, then sharpen for output.
Why? Because resizing changes edge relationships. If you sharpen first and resize later, the resize can smear that work or widen artifacts. A light output sharpen pass at the final dimensions is much easier to control, especially for web exports, small product images, and social media graphics.
If you only remember one practical rule from this article, make it this one: sharpen for the final size, not for a size that is about to change.
When upscaling should come first
Small files, crops, and print jobs
Upscaling should come first when the file is too small for the result you need. That usually means:
- preparing a print larger than the original file can support
- enlarging a heavy crop
- using a thumbnail or chat-app download in a bigger layout
- trying to make a small e-commerce image hold up in zoom view
In these cases, sharpening is not the main fix because the image lacks pixels. You can make those existing pixels look sharper, but the file is still too small. That is why small photos often look "sharp but bad" after aggressive editing. The edges are louder, but the actual image still breaks apart when enlarged.
If your goal is physical print, real pixel dimensions matter more than preview punch. Our guide on what resolution is needed to print an AI-upscaled photo goes deeper on the print math, but the practical takeaway is simple: when the output gets bigger, size becomes a real requirement, not just a visual preference.
Old scans and chat-app downloads with too few pixels
Old photos and compressed downloads are common edge cases because they often need both reconstruction and restraint. A small family scan, a WhatsApp image, or a low-res archive photo may not have enough clean detail for ordinary sharpening to work well.
That is where upscaling can help more than a normal sharpen filter. A good AI upscaler can enlarge the file, reduce some roughness, and rebuild edges more naturally than simply forcing contrast into a tiny pixel grid. But it still helps to stay conservative. If 2x is enough for the job, 4x is not automatically better.
The goal is not to make the strongest-looking preview. The goal is to make the image usable at the size you actually need while keeping faces, textures, and text believable.
What happens when you choose the wrong tool
Why sharpening a tiny file looks crunchy
When people sharpen a tiny file instead of upscaling it, the usual problems show up fast:
- bright halos around edges
- text that looks thicker instead of cleaner
- facial texture that turns brittle
- compression blocks that become more obvious
- noisy backgrounds that start looking rough
This happens because sharpening only works with existing pixels. On a weak file, there is not much solid detail to reinforce, so the tool boosts flaws along with the useful edges.
That is why a low-resolution image can look improved at screen-fit size but worse at 100% zoom. The preview hides the damage. The zoom view reveals it.
Why unnecessary upscaling can look fake
Upscaling has its own failure mode. If a photo is already large enough and reasonably clean, enlarging it "just in case" can introduce synthetic texture, odd facial detail, or a slightly plastic look that was not necessary in the first place.
This matters most for portraits, archival images, and emotionally important photos where likeness matters more than drama. If the eyes, hair, or skin start looking invented, the tool is no longer helping. It is replacing the source with a guess.
So the decision is not "which tool is better?" It is "which problem do I actually have?" The wrong answer usually costs quality.
If the photo needs both, use this order
Clean noise first
If the image is noisy, grainy, or full of JPEG damage, do not sharpen that mess first. Clean it first, or use a tool that handles cleanup as part of the enhancement pipeline.
This is especially important for:
- low-light phone photos
- old scans with rough texture
- screenshots with compression damage
- portraits where skin can break apart quickly
Noise behaves like false edge detail, so sharpening tends to lock it in. Once that happens, the rest of the workflow gets harder.
Upscale to the target size, then sharpen lightly
For a photo that is both small and soft, the safest workflow is usually:
- inspect the image at 100% zoom
- reduce obvious noise or compression if needed
- upscale only as much as the final use requires
- apply light sharpening at the final size
- compare the result against the original for believability
This order works because each step prepares the next one. Upscaling solves the size problem. Final sharpening adds edge clarity once the file is already where it needs to be.
If you want the shortest path without a full editing app, PhotoSharpener fits this workflow well because it combines AI upscaling, cleanup, and restrained sharpening in one browser-based process. The important part is still moderation. Stop when the image looks natural, not when it looks the most intense.
A simple decision workflow you can use in one minute
Quick yes or no checks
If you are unsure which tool to use, run through these checks:
- Is the file already large enough for the final use?
If yes, sharpening may be enough. If no, upscale first. - Does the image mainly look soft, or mainly look small?
Soft points to sharpening. Small points to upscaling. - Do you see grain, blocks, or waxy-looking roughness?
Clean that before final sharpening. - Are faces or text starting to look fake?
Back off the strength or use a smaller upscale.
This takes less than a minute, and it prevents most avoidable mistakes.
Beginner-friendly browser workflow
For casual users, the easiest practical workflow is often:
- upload the cleanest file you have
- decide the final use before enhancing
- choose upscaling only if the image is too small
- sharpen lightly only after the size is settled
- inspect eyes, hair, text, and strong edges before downloading
If the image is for a memorial print, family archive, or profile photo, lean toward the version that still looks like the same person. A slightly softer but believable result is usually better than a hyper-detailed result that changes facial structure or texture.
A good enhancement should look like the original image on a better day, not like a different image entirely.
FAQ
Should I sharpen before or after upscaling?
Usually after. Get the image to the final size first, then add a light sharpen pass if the result still needs more edge definition.
Can sharpening increase resolution?
No. Sharpening can improve perceived clarity, but it does not add pixels or make a small file truly larger.
Can upscaling fix blur by itself?
Sometimes it can improve a mildly soft low-resolution image, but it cannot fully solve severe focus misses or heavy motion blur. In those cases, the extra detail becomes more speculative.
What if the photo is noisy and blurry?
Clean the noise first, then decide whether the image mainly needs more size or just a light final sharpen. If it needs both, upscale before the sharpening step.
What is the safest rule if I still cannot decide?
Ask this: Is the image already big enough for the final use? If yes, try sharpening first. If no, upscale first. That one question solves most of the confusion.