Blur Diagnosis & Fixes
Can motion blur be removed from a photo?

TL;DR
- Mild motion blur can often be improved if the file still has readable edges and a short blur streak.
- Heavy streaking has a hard ceiling, so aim for a cleaner, believable result instead of perfect recovery.
- Start with the best original file, reduce obvious noise first, and deblur before you upscale.
- PhotoSharpener is a practical browser option when you want blur cleanup, artifact reduction, and upscaling in one workflow.
Can motion blur be removed from a photo? Sometimes yes, and often enough to save the image, but not in the miracle way many people hope for.
Motion blur happens when detail gets dragged across the frame during the exposure. That makes it harder to fix than ordinary softness because the original edges were smeared in a direction, not just dulled. Mild blur from shaky hands or a moving subject can improve a lot. Heavy streaking usually cannot be fully reversed.
So the practical goal is not "make it perfectly sharp no matter what." It is to work out how severe the blur really is, start from the cleanest file you can get, use the right kind of deblur, and stop as soon as the image looks believable again.
What motion blur actually is
Subject movement is different from camera shake
Motion blur usually comes from one of two things. Either the subject moved while the shutter was open, or the camera moved. In both cases, the result is directional smearing, but the pattern is not always the same.
If a person turned their head, waved a hand, or walked through the frame, you may see only part of the image streaking while the background stays fairly sharp. If your hands moved during a low-light shot, the whole frame may drift in one direction. That is different from missed focus, where edges tend to dissolve evenly instead of stretching. If your file looks soft rather than streaked, our focus-blur guide is the better match. If you are still sorting out which kind of blur you have, the broader blur guide walks through the diagnosis step by step.
Directional streaks tell you what you are dealing with
Before you open any tool, zoom in and look for the pattern of failure:
| What you see | Most likely issue | Best first move |
|---|---|---|
| Whole frame smeared in one direction | Camera shake | Try motion-specific deblur |
| Subject streaked but background mostly okay | Subject movement | Deblur carefully and judge only the subject |
| Soft edges with no obvious streak direction | Missed focus | Use a focus or lens-blur workflow instead |
| Blur plus blockiness and ugly edges | Motion blur plus compression | Find a better source before editing |
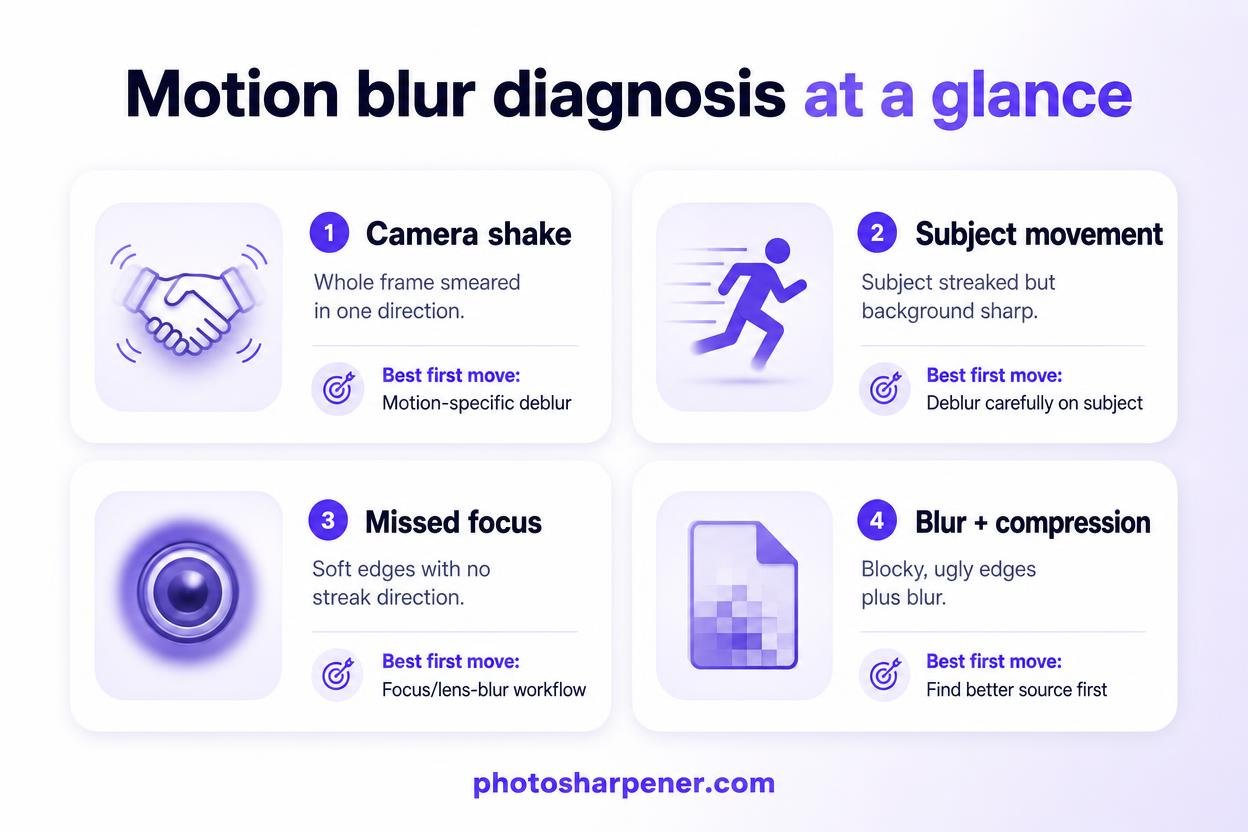
That diagnosis matters because motion blur tools work best when the blur direction is fairly clear. If the file is also tiny, noisy, and heavily compressed, the editing job gets much harder.
When motion blur can really be removed
Light blur often improves more than people expect
The best candidates are photos where the subject is still recognizable at full size and the blur streak is relatively short. You can still make out eyes, text strokes, clothing seams, or object edges, but they look dragged instead of crisp.
That kind of file often responds well to modern AI deblur or careful manual sharpening because there is still structure left to work with. The result may not look like a perfectly frozen original shot, but it can move from disappointing to clearly usable.
Heavy streaking still has a hard ceiling
Once a face, hand, or object has been stretched across a long streak, the missing detail is genuinely gone. Software can make the image look cleaner, but it cannot faithfully restore information that was never captured in a readable form.

A simple decision rule helps here: if you can still identify real edges, rescue is worth trying. If the subject has turned into a smear of shapes and color, aim for partial improvement, not full recovery.
This is where people often push too far and end up with halos, fake texture, or a face that no longer looks like the original person. If you want a broader reality check on recovery limits, see our article on recovery limits.
Start with the best source before editing
The original file matters more than people expect
A motion-blurred original is still far easier to rescue than a motion-blurred WhatsApp copy, screenshot, or social download.
Compression strips away edge detail that deblur tools need. So before you edit anything, look for the best version you can access:
- the original camera or phone file
- the cloud backup version
- the first export before it went through a chat app
- a fresh scan if the only surviving copy is a print
This step is boring, but it often creates a bigger improvement than switching between five enhancers.
Inspect blur at full size before you choose a tool
Adobe's guidance for Smart Sharpen recommends judging sharpening at 100% zoom, and that is exactly right for motion blur.
Check the parts that reveal failure first:
- eyes and eyelashes
- text edges
- jewelry, seams, or hard outlines
- hair or fur
- noisy shadow areas
If those details still have readable structure, you have a real repair path. If they are stretched into long translucent doubles, your goal should shift toward making the photo cleaner and more natural, not trying to force full sharpness.
How to remove motion blur without wrecking the photo
Denoise first when low light added grain
A lot of motion blur comes from low-light shooting, and low light usually means noise too. If you sharpen noisy blur first, the result often gets gritty and brittle.
Topaz's sharpening documentation also recommends dealing with noise before stronger sharpening when the file is grainy, because sharpening can mistake noise for detail and exaggerate it. In practice, that means your safest sequence is:
- start with the best original file
- reduce obvious noise if the photo is grainy
- run one moderate motion-deblur pass
- compare at full size
- upscale only if the repaired file is still too small for the final use
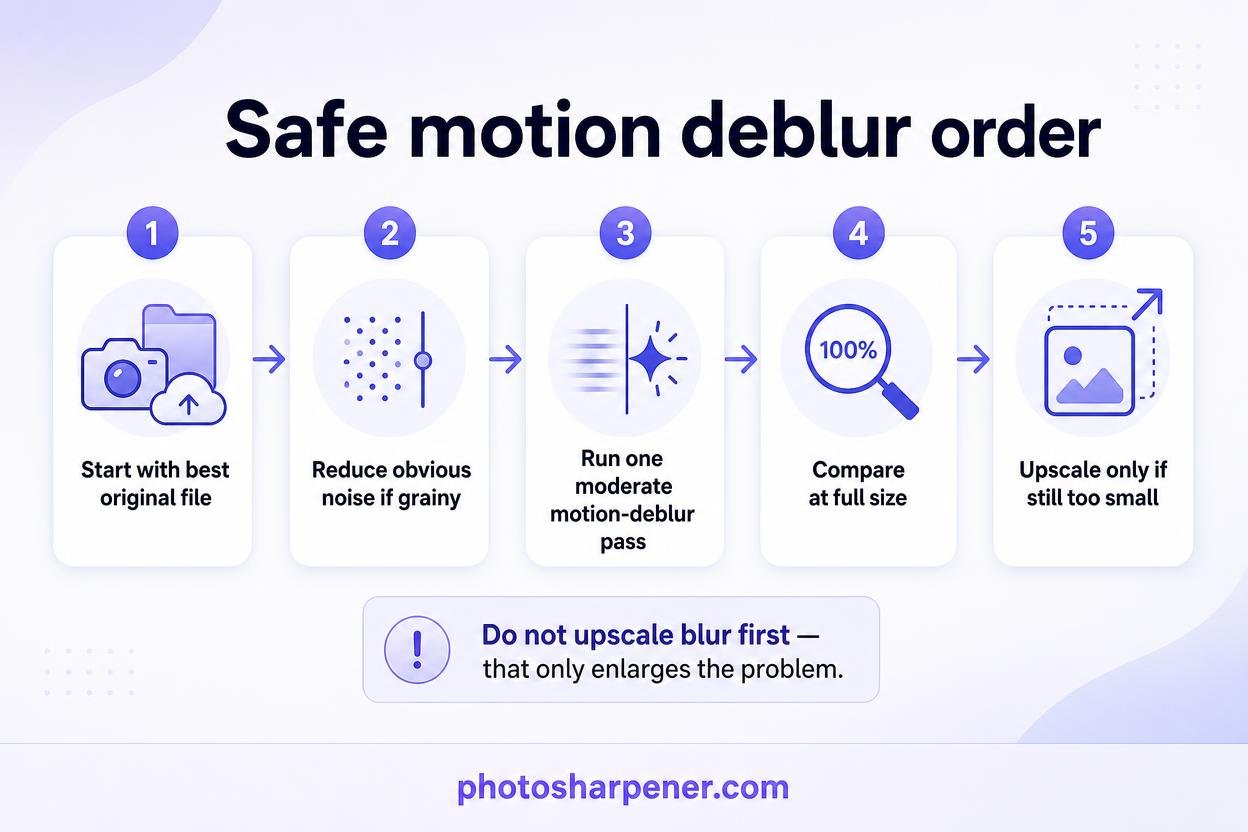
That order matters. If you enlarge the blur first, you just create a bigger blur problem.
Match the blur type and keep the first pass conservative
The most common editing mistake is treating every blurry photo like it needs maximum sharpening.
Motion blur responds best when the tool matches the problem. In Photoshop, the official Smart Sharpen controls let you set Remove: Motion Blur and adjust the blur angle. That is useful when the streak direction is fairly simple and you want manual control.
If the file also has compression, low resolution, or mixed softness, AI tools are often easier because they handle several problems in one pass. A browser-based workflow such as PhotoSharpener can make sense here because it combines blur cleanup, artifact reduction, and upscaling without forcing a beginner into a full desktop retouching setup.
Use a simple check after every pass:
- if the photo looks clearer and still believable, you are moving in the right direction
- if edges become crunchy or bright, back off
- if faces start looking redrawn or waxy, stop immediately
- if nothing improves after a moderate pass, the file may already be at its limit
Which tools work best for motion blur
Photoshop works best on simple directional blur
Photoshop is still useful when the blur is easy to read and you want fine control rather than automation.
For a straightforward handheld blur, a practical workflow is:
- convert the layer to a Smart Object
- open
Filter > Sharpen > Smart Sharpen - set
RemovetoMotion Blur - match the angle to the streak direction
- adjust amount, radius, and noise reduction while viewing at 100%
That works best when the blur is fairly uniform. If different parts of the frame are blurred in different ways, manual sharpening gets harder to keep natural.
AI tools are easier when the file has mixed problems
Modern AI tools do better when the image is not just motion blurred, but also noisy, compressed, or slightly too small. They are also the easier option for casual users who just want one good result rather than a full editing session.
If you are on a supported Pixel device, Google's Photo Unblur is a quick first test for old or everyday photos. If you want a simple browser workflow, PhotoSharpener is a practical option because it sharpens, cleans artifacts, and enlarges the file in one place.
The right expectation is still important. AI can often make mild motion blur look dramatically better, but long streaks from fast movement rarely come back as a truly sharp, truthful image.
What to do when the photo is still too blurry
Change the output goal instead of overprocessing
Sometimes the smartest fix is not more deblur. It is using the image differently.
A photo that falls apart at poster size may still look good in a phone gallery, small frame, memorial card, product thumbnail, or social post. So if the image matters, try changing the delivery before you keep pushing the sliders.
Use crops, smaller prints, and honest expectations
When a file has reached its ceiling, these fallback moves often work better than another aggressive edit:
- crop tighter around the clearest area
- use a smaller print size
- keep the image for screen use instead of large print
- convert to black and white if color noise and ghosting are distracting
- preserve some softness if that version still looks more truthful
If the end goal is print, it also helps to match your ambition to the pixels you really have. Our guide on print resolution can help you decide whether the repaired file is big enough for the size you want.
How to prevent motion blur next time
Use more light and a steadier hold
Motion blur gets worse when the camera is forced into a slower exposure. So the biggest prevention win is simple: give the camera an easier job.
Use brighter light when you can, brace your elbows, lean against something stable, and take a short burst instead of trusting one frame. In low light on iPhone, Apple also recommends holding the phone steady, cleaning the lens, and removing magnetic or lens accessories if you keep seeing motion blur or other camera problems. Their support guidance on blurry iPhone photos is a useful checklist if the problem keeps repeating.
Help your phone or camera do less guesswork
A few habits reduce blur fast:
- tap the subject before shooting so focus and exposure are more intentional
- avoid digital zoom in dim light
- shoot multiple frames when the subject is moving
- use Night mode carefully and keep the phone still while it captures
- choose a clearer frame from a motion sequence when your device offers that option
If you are using Google Photos on a supported Pixel device, Photo Unblur is also worth trying on older shots you cannot retake. But prevention is still easier than recovery. A cleaner original always beats a heroic rescue.
FAQ
Can motion blur be removed completely?
Sometimes light motion blur can be reduced enough that the photo looks sharp in normal use. Heavy motion blur usually cannot be removed completely because too much directional detail was lost during exposure.
Is motion blur harder to fix than out-of-focus blur?
Often, yes. Motion blur drags detail across the frame, which makes clean recovery harder. Mild focus errors are sometimes easier to improve because the structure is still more evenly preserved.
Should I sharpen or upscale first?
Sharpen or deblur first, then upscale only if you still need more pixels. If you upscale a motion-blurred photo first, you usually end up with a larger version of the same problem.
