Social Media Photo Quality
Best way to fix a blurry profile picture?

TL;DR
- Most blurry profile pictures come from a weak source file, the wrong square crop, or platform compression after upload.
- Start with the original photo, not a screenshot, and crop it as a square before you sharpen anything.
- Export a clean square at the right size for the platform, keep the face centered, and use PNG for logos or JPG for photos.
- If the image itself is soft, do one light cleanup pass before upload. PhotoSharpener can help with mild blur, but severe blur still has limits.
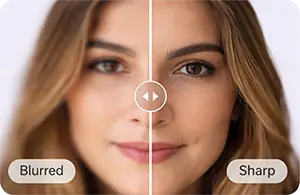
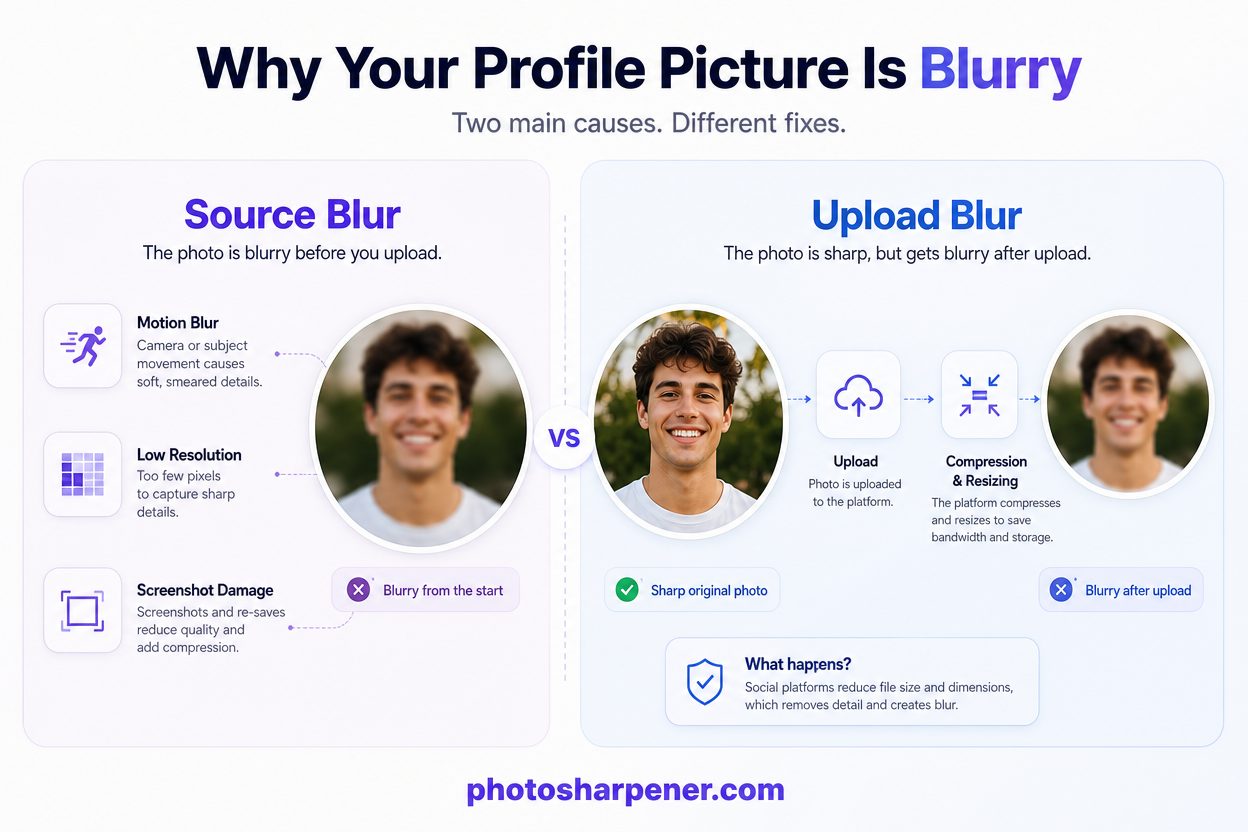
The best way to fix a blurry profile picture is to separate two different problems: a photo that is already blurry, and a photo that only turns blurry after you upload it.
That matters because the fix changes completely. A soft original needs cleanup. A sharp original that looks worse after upload usually needs a better crop, better export settings, or both. If you skip that diagnosis, it is easy to keep sharpening the wrong file and still end up with a fuzzy avatar.
Profile pictures are also unusually unforgiving because they are shown small, often inside a circle, and often compressed by the platform. So the goal is not just "make the photo sharper." The goal is to make sure the face reads clearly at tiny size without looking crunchy or fake.
If the image is blurry everywhere, our guide to making a blurry photo clear again helps with the broader recovery workflow. This article stays focused on the fastest way to turn one weak image into a usable profile picture.
Diagnose where the blur is happening
Source blur and upload blur are different problems
Many profile pictures look bad for one of four reasons:
- the original image is genuinely soft
- the file is a screenshot, social download, or chat copy
- the crop is wrong for a square or circle avatar
- the platform recompresses the upload and softens it
The cleanest fix starts with identifying which one you have. If the photo already looks weak in your gallery or editor at full size, uploading will not save it. If it looks fine before upload and only turns fuzzy inside the app, the issue is usually export prep, not the camera.
Use a one-minute symptom check before editing
| What you see | Most likely cause | Best first move |
|---|---|---|
| The image looks soft everywhere, even before upload | Original photo is blurry or too low-res | Find the best original, then do light cleanup |
| It looks fine on your device but worse after upload | Platform resized or recompressed it | Re-export as a clean square at the right size |
| Face looks cropped too tight or off-center | Wrong square crop for a circular frame | Re-crop with extra padding around the head |
| Text or logo edges look fuzzy | File is too small or wrong format | Export a larger square and prefer PNG |
| The photo looked okay until it was screenshotted or forwarded | Compression and re-saving damage | Go back to the original file |
Once you know which row matches your situation, the next step becomes much more obvious.
Start with the best source file you can get
Never edit the screenshot if the original still exists
This is the mistake that wastes the most time.
If your profile picture came from Instagram, WhatsApp, Facebook, LinkedIn, or a friend who sent it through chat, there is a good chance you are working from a weaker copy than you need to. Screenshots and repeatedly re-saved JPEGs strip away detail before you even start editing. That makes every later step harder.
So before you sharpen anything:
- find the original photo from the phone or camera
- check cloud backups or the first exported version
- ask the sender for the original if they still have it
- avoid screenshots unless they are truly your only copy
If the problem started after messaging or social sharing, our guide to why photos lose quality after WhatsApp sending explains why the file often gets softer before you touch it.
If the source is tiny, reset expectations early
Some profile pictures are not blurry so much as starved of pixels. A small old crop might still work at comment-size display, but once you ask it to fill a profile frame on a modern phone screen, it starts to fall apart.
That does not mean the image is hopeless. It means your best result may be "cleaner and more readable," not "perfectly sharp." Mild softness, light compression, and small portraits often respond well to careful enhancement. A heavily pixelated download with almost no facial detail has a much lower ceiling.
Re-crop the image for profile picture geometry
Build a square before you upload
Most platforms store the profile picture as a square even when they display it as a circle. If you upload a tall portrait or a wide landscape and let the app crop it automatically, you give away control at the most important stage.
Start by making your own square crop first. That lets you decide what stays in frame and what gets cut. In most cases, the face should be the clear subject, with just enough shoulder and background to avoid a cramped result.
If the photo is for a business account or creator brand, the same rule applies to logos: build the square yourself and center the mark before the platform touches it.
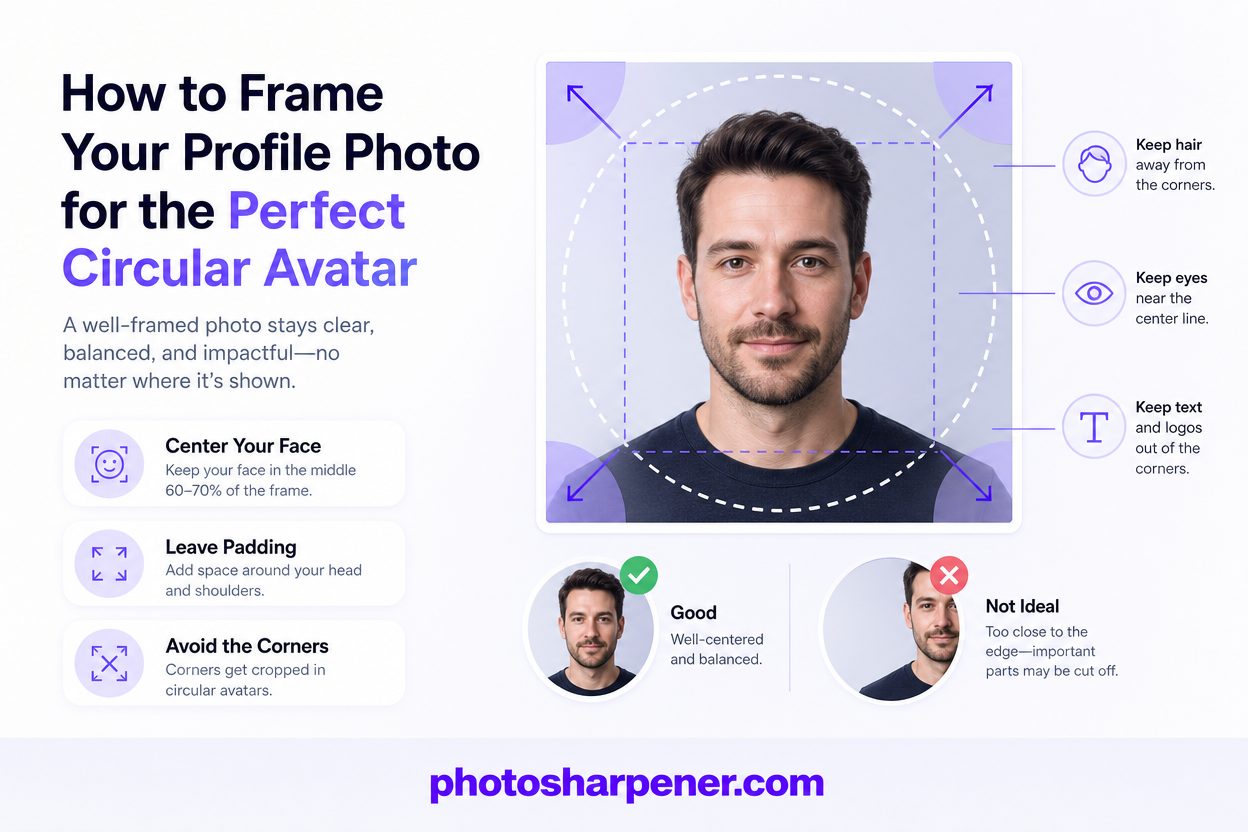
Compose for the circle, not just the square
A square crop can still fail if the final avatar is shown as a circle.
Use this quick framing rule:
- keep the face or logo in the middle 60 to 70 percent of the frame
- leave some empty space around the edges
- avoid putting eyes, hair, text, or logos close to the corners
- check that the photo still reads clearly if the corners disappear
This is especially important on LinkedIn, Instagram, and similar apps where the circular crop hides the outer edges. According to LinkedIn Help, profile photos must be at least 400 by 400 pixels, and LinkedIn recommends a photo that does not need much cropping. That advice matters because every extra crop reduces the visible detail around your face.
Export at the right size and format
Match the platform instead of letting it guess
Uploading the biggest file you have is not always the smartest move. Platforms still resize and compress profile pictures, so your goal is to give them a clean, well-sized square that needs as little destructive processing as possible.
These starting points work well in practice:
| Situation | Safe export starting point | Why it helps |
|---|---|---|
| LinkedIn headshot | 800 x 800 or 1000 x 1000 square | Keeps you above LinkedIn's minimum while staying easy to crop cleanly |
| Instagram or similar social avatar | 1080 x 1080 square | Gives the app room to downscale instead of stretching a tiny source |
| Logo or brand icon | Large square PNG | Preserves hard edges and small shapes better than JPEG |
| Older photo with mild softness | Clean square after enhancement, then export once | Avoids stacking extra re-saves after editing |
If the platform publishes hard requirements, follow them. If it does not, a clean square between 800 and 1080 pixels per side is usually a safe everyday target for profile photos.
Choose JPG for photos and PNG for graphics
Use high-quality JPG for normal headshots and portrait photos. It keeps file size manageable and usually looks fine when the source is already clean.
Use PNG when the profile picture includes:
- text
- logos
- flat graphics
- line art
- shapes with very hard edges
That split matters because JPEG compression tends to soften crisp graphic edges first. A real face often survives JPG well. A logo or initials avatar often does not.
Fix mild blur before you upload
Use light edits before you reach for AI
If the image is only a little soft, start with basic cleanup instead of a heavy AI pass.
A simple sequence works well:
- increase exposure only if the face looks too dark
- add a small contrast boost so features separate better
- apply light sharpening, not maximum sharpening
- reduce obvious noise before adding more sharpness
The goal is to help the face read clearly at small size. It is not to make every eyelash look hyper-detailed. That is how profile pictures start to look brittle and overprocessed.
Use AI only when the photo is soft, not destroyed
AI tools are most useful when the picture still has real facial structure but needs a moderate lift. They can help with mild blur, small-file softness, and compression damage better than a basic sharpen slider can.
If you want a quick browser-based option, PhotoSharpener can be a practical first pass for profile photos because it combines sharpening, cleanup, upscaling, and optional face-aware restoration in one place. The key is to stay conservative. If the face starts looking like a different person, back off and keep the more natural version.
If you are deciding between classic sharpening and AI cleanup, our guide to AI upscaling vs normal sharpen filter explains where each one helps most.
Preview the profile picture at actual size
Shrink it before you call it finished
One trap with profile pictures is judging them at full-screen size only.
An edit can look impressive at 1200 pixels wide and still fail as an avatar. The face may be too dark, the crop may be too tight, or the sharpening may be so aggressive that the features look harsh once they are reduced to a tiny circle.
Before you upload, zoom out or create a small preview. Ask:
- can I recognize the person instantly?
- do the eyes, glasses, or hairline still look natural?
- does the face stand out from the background?
- does any text or logo stay readable at small size?
If the answer is no, do not sharpen harder first. Revisit the crop, contrast, or export size.
Re-upload once if the platform softened it
If the file still looks worse after upload, do one controlled retry.
Delete the weak upload, go back to the clean master file, and export again using the correct square size and format. Do not keep editing the already-downloaded version from the platform. That turns one compression pass into two or three.
If the blur seems inconsistent between devices, refresh the app and check the profile on another phone or desktop browser before you assume the new export failed. Sometimes the cached preview looks worse than the final stored version.
Mistakes that make profile pictures look worse
Over-sharpening faces and eyes
The most common editing mistake is pushing clarity until it looks "strong."
That usually creates:
- glowing edges around the face
- crunchy skin texture
- overly dark outlines around eyes, hair, and glasses
- a result that looks sharper but less human
For profile pictures, believable beats dramatic almost every time. A clean, natural face at small size is stronger than a hyper-sharpened one.
Re-saving, re-screenshotting, and over-cropping
The second big mistake happens after the edit is done.
People export a decent result, take a screenshot of it, crop it again inside another app, and then upload that weaker copy. Or they crop so tightly that the platform has no room left for its circular frame. Both mistakes quietly throw away quality.
Keep one clean final export and upload that file directly. If you need a second version for another platform, create it from the clean master rather than from a downloaded or screenshotted copy.
A simple workflow that works for most people
Six steps from blurry photo to usable profile picture
If you want the shortest dependable workflow, use this order:
- get the best original file you can find
- crop it into a square yourself
- frame the face or logo for a circular avatar
- apply light cleanup if the image is mildly soft
- export a clean square at the platform-friendly size
- preview it small, then upload the clean export once
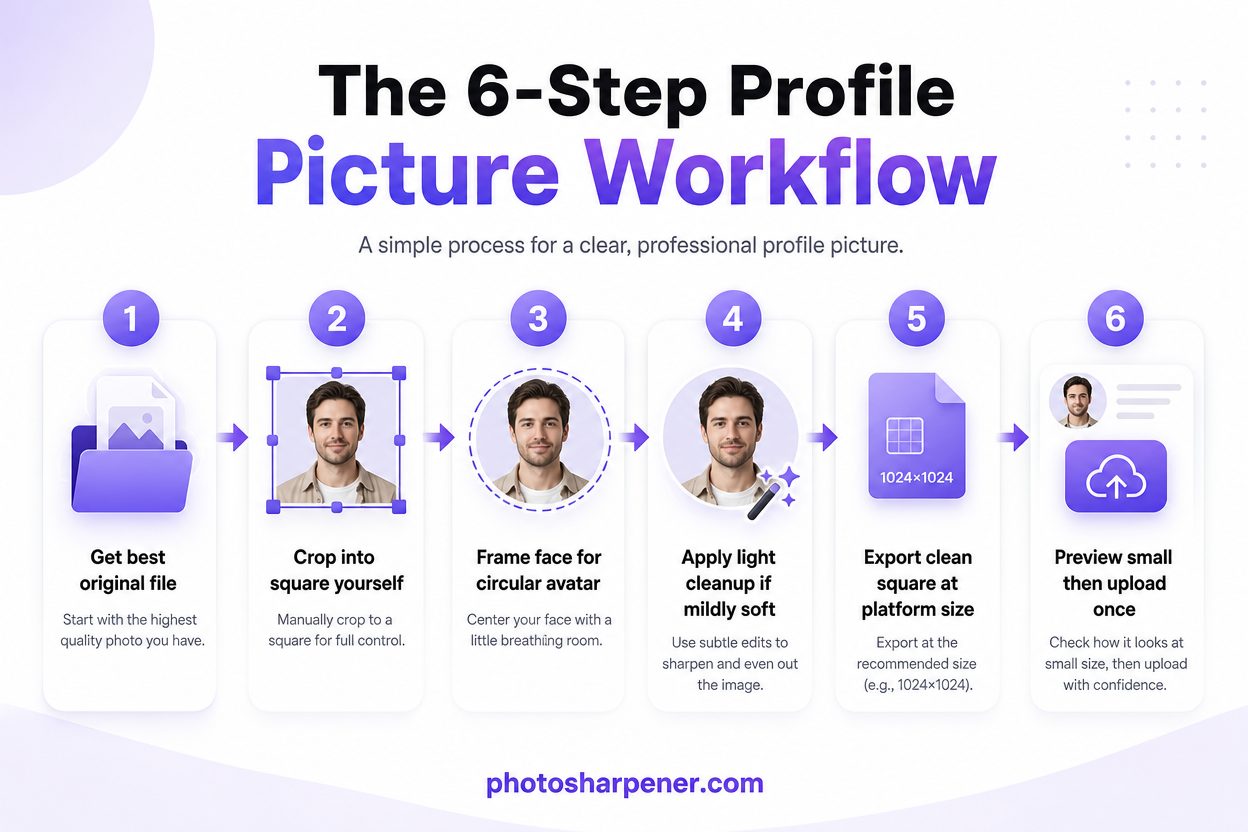
That sequence works because it fixes the highest-impact problems first. It keeps you from sharpening screenshots, over-cropping the face, or letting the platform guess how to resize your image.
When the file still is not good enough
Sometimes the honest answer is that the original is too weak.
If the face is deeply blurred, the crop is extremely tiny, or the image was already damaged by repeated compression, you may still improve the profile picture, but you probably will not make it truly crisp. At that point, the best move may be to choose another photo, ask for the original, or retake the image with better light and focus.
That is not failure. It is just respecting the ceiling of the source file.
FAQ
Why does my profile picture look sharp before upload but blurry after?
Usually because the platform resized or recompressed it. Export a clean square at the right size first, then upload that file directly instead of a screenshot or oversized original.
What size should I use for a profile picture?
Use the platform's published minimum if it has one. In general, a clean square between 800 and 1080 pixels per side works well for many profile-photo uploads because it gives the platform room to downscale cleanly.
Should I use JPG or PNG for a profile picture?
Use JPG for normal photos and portraits. Use PNG for logos, initials, text, or flat graphics that need crisp edges.
Can AI fix a blurry profile picture?
Often, yes, if the blur is mild and the face still has real structure. AI is much less convincing when the image is extremely blurry, tiny, or already badly compressed.