Group & Portrait Recovery
Can blurry group photos be improved?

TL;DR
- Yes, blurry group photos can often be improved, especially when faces are still recognizable and the original file is decent.
- Group shots are harder than single portraits because people sit at different distances, faces are smaller, and one soft face can ruin the whole image.
- Start with the best source, reduce obvious noise or compression, and fix blur before you upscale.
- Face-aware AI tools usually do better than a normal sharpen slider because they can treat each face separately.
- Large groups still have limits, so aim for a clearer, believable result instead of perfect sharpness on every person.
Can blurry group photos be improved? In many cases, yes, and often enough to save the memory. But the honest answer depends on what kind of group photo you have, how bad the blur is, and how large each face appears in the original file.
A group shot is harder to rescue than a single-person portrait because not everyone fails the same way. One person may be slightly soft from missed focus. Another may be darker because they were farther from the flash. A child may have moved. And the faces in the back row may simply be too small for any tool to recover fully.
So the goal is not to make every person look like they were photographed in a studio. The goal is to improve the overall photo, recover the faces that still hold usable structure, and stop before the image starts looking fake.
Why group photos are harder to fix than single portraits
Different faces can fail for different reasons
A single portrait usually has one main subject and one main blur problem. Group photos are messier.
In the same frame, you might see:
- front-row faces that are fairly sharp
- back-row faces that are soft because they sat outside the focus plane
- one person blurred by movement
- noisy shadows on people farther from the light
- a low-resolution file where every face is already small
That mix matters because there is no one perfect setting for all of it. A heavy sharpen pass that helps the back row can make the front row crunchy. Strong face recovery that helps one person can make another look over-processed.
Face size sets the recovery ceiling fast
This is one of the most important realities in the entire workflow.
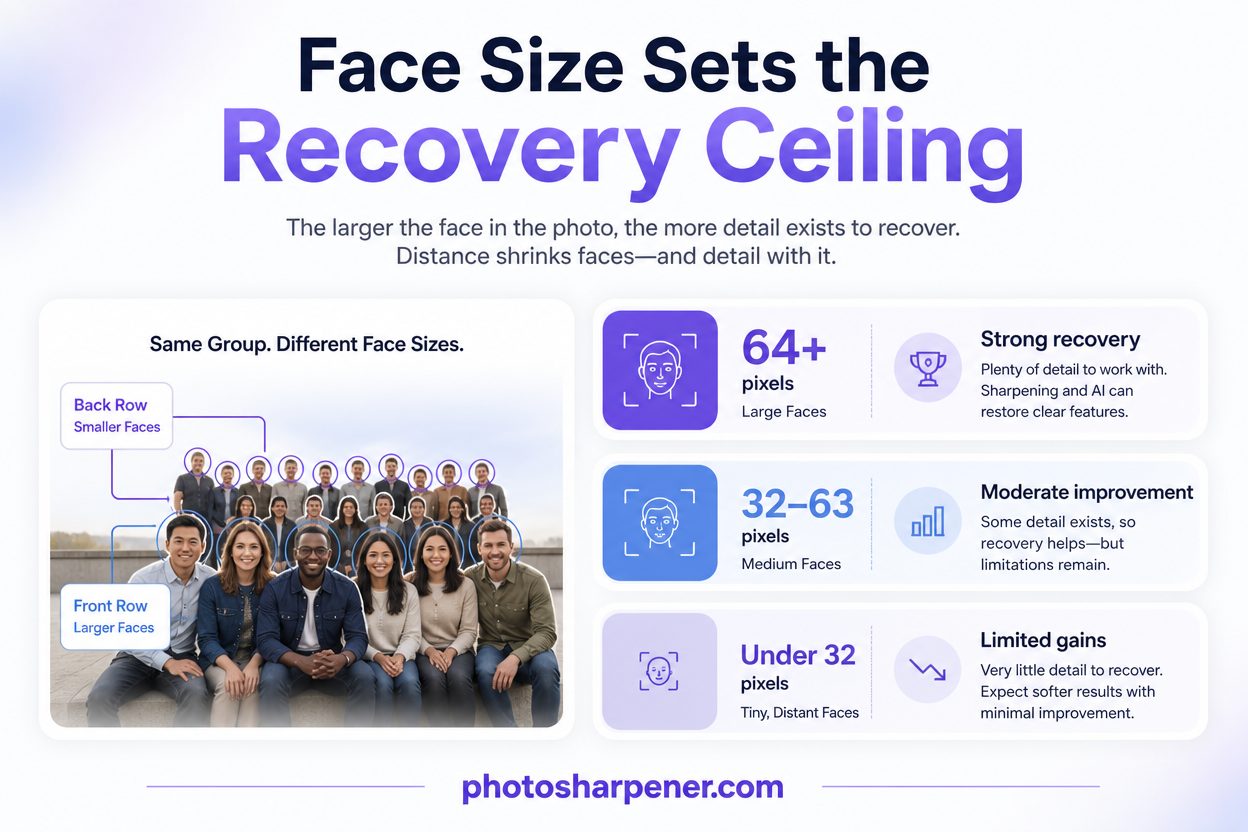
Face-aware restoration works best when each face still has enough pixel information to read. The Real-ESRGAN face-enhancement guide notes that face enhancement works best when faces are at least about 64×64 pixels. Below that, some faces may not be detected well, or they may improve only a little.
That is why a blurry family portrait with four people often recovers much better than a reunion photo with thirty people. The tool is not being inconsistent. It simply has more real information to work with in the larger faces.
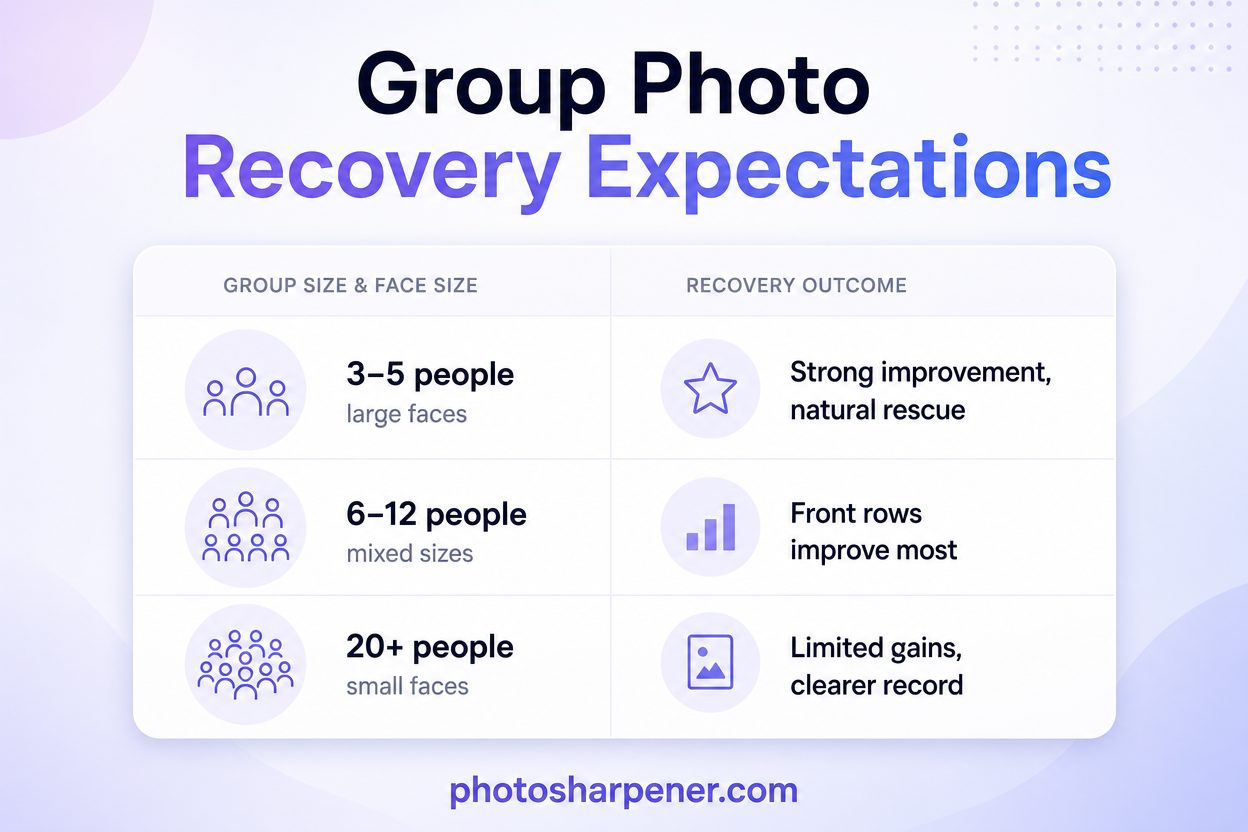
| Group photo situation | What recovery usually looks like | Best expectation |
|---|---|---|
| 3 to 5 people, faces fairly large | Strong improvement on most faces | Natural-looking rescue |
| 6 to 12 people, mixed face sizes | Front and middle rows improve most | Better overall readability |
| 20+ people, small distant faces | Limited gains on the smallest faces | Clearer group record, not portrait detail |
Which blurry group photos improve the most
Small groups and front-row faces usually respond best
If the group is small and the faces are still readable at full size, you have a strong chance of improvement.
This is especially true when:
- the blur is mild or moderate rather than severe
- the faces are large enough to inspect clearly
- the original file has not been crushed by chat-app compression
- the photo is soft from slight missed focus, low light, or a modest amount of movement
In those cases, a good AI workflow can often restore cleaner eyes, better facial edges, and a more usable overall image.
Large groups and severe blur still have hard limits
The farther people are from the camera, the less detail each face contains. That is why big class photos, event photos, and reunion shots are the hardest to "fix" in a way that looks truly sharp.
The common pattern across competitor pages is consistent: front-row faces often improve a lot, middle rows improve enough to become more identifiable, and tiny back-row faces may only look a bit cleaner. That is still valuable. A photo does not have to become perfect to become usable again.
Use a simple decision rule before you spend too much time:
- if you can still recognize facial features at 100% zoom, rescue is worth trying
- if faces have turned into smooth blobs of color, expect only partial improvement
- if only one or two people matter most, plan around those faces instead of the whole frame
Start with the best source file you can get
Find the original before you edit anything
People often try to rescue the weakest version of the photo. That makes every tool look worse.
Before editing, look for:
- the original camera or phone file
- the cloud backup version
- the first export before it went through a messaging app
- a fresh scan if the only surviving copy is a print
A blurry original is still much easier to improve than a blurry WhatsApp copy. Compression strips away the edge detail and skin texture that deblur and face-repair tools need.
If the image is a printed photo, scanning usually gives you a better starting point than photographing the print with a phone. If you need help with that step, our guide on scanning an old print before AI restoration covers the setup in practical terms.
Inspect the weak spots at full size
Do not judge a group photo from a fit-to-screen preview.
Open the image large enough to inspect the parts that fail first:
- eyes and eyelashes
- hairlines and eyebrows
- glasses frames
- teeth and mouth edges
- shirt seams and other high-contrast edges
This quick inspection tells you whether you are dealing with mild softness, motion blur, low resolution, or a mix of all three. If the blur looks directional, our article on motion blur recovery is the better companion. If the softness is even and gentle, the problem may be closer to out-of-focus blur.
Use the right repair order for group shots
Reduce obvious noise or compression before strong sharpening
A lot of group photos were taken indoors, at night, or with older cameras. That means noise is often part of the problem.
If you sharpen noisy faces too early, you can make skin look gritty and edges look brittle. If the file also came from a chat app, sharpening may exaggerate blocks and smearing instead of recovering detail.
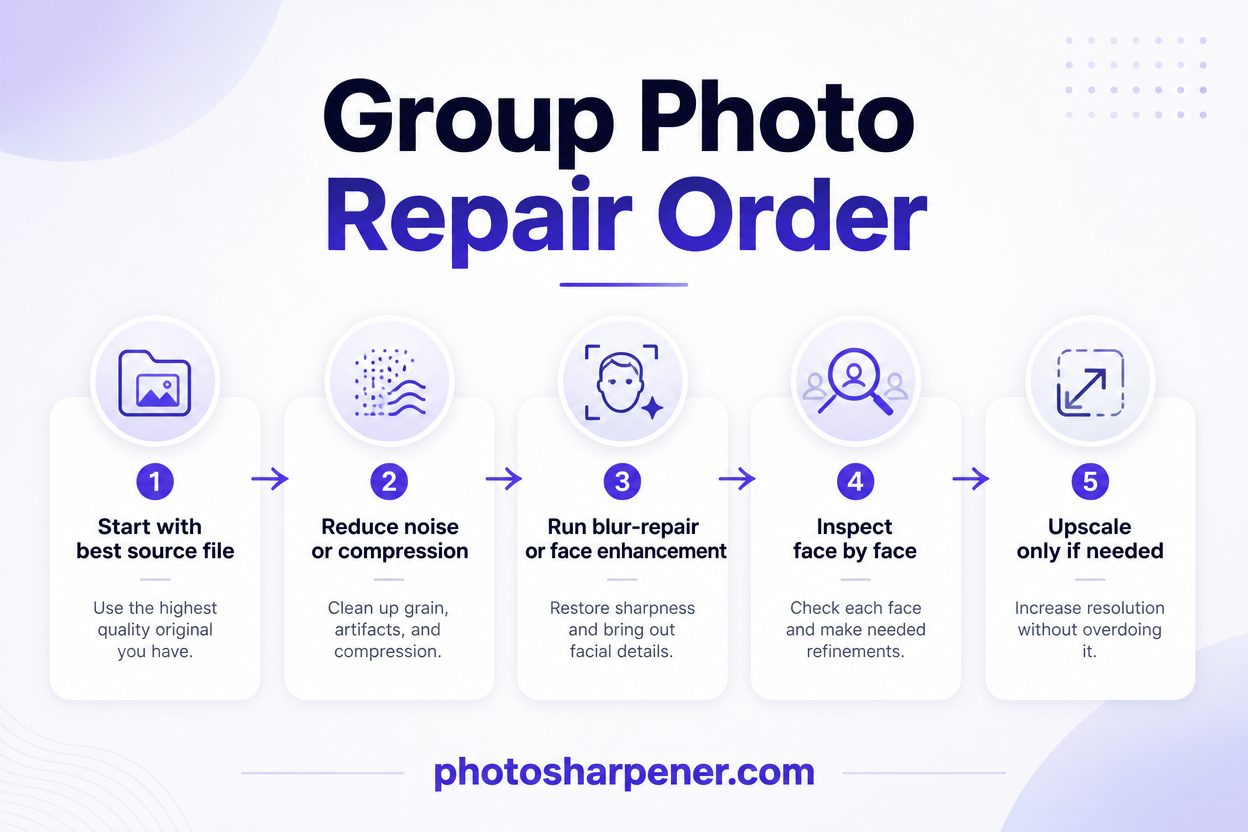
The safest order is:
- start with the best source file
- reduce obvious noise or artifacting if it is severe
- run one moderate blur-repair or face-enhancement pass
- inspect the image face by face
- upscale only if the repaired image is still too small for the final use
That order works because upscaling a soft, compressed photo simply gives you a bigger soft, compressed photo.
Deblur first, then upscale if size is also a problem
This is another point where ranking pages align closely.
If the photo is blurry and small, it is tempting to enlarge it immediately. But blur repair usually works better before enlargement because the model is trying to rebuild clarity from the cleanest possible base.
For group photos, that matters even more. Once you enlarge a weak file, the smallest faces can become bigger without actually becoming better. So fix the softness first, then add pixels only if you need the image for print, framing, or a larger digital use.
If print is the end goal, our guide on what resolution is needed to print an AI-upscaled photo will help you decide whether the repaired file is large enough.
Which tools usually work best on blurry group photos
Face-aware AI beats a normal sharpen slider for most people
Traditional sharpening boosts contrast along edges that already exist. That can help a little, but it does not solve the real group-photo problem, which is that each face may need slightly different help.
Face-aware AI tools are more useful because they can:
- detect multiple faces in one frame
- restore facial features separately from the background
- improve overall detail while keeping the whole image consistent
That matches how modern restoration pipelines work. Real-ESRGAN handles the broader image, while GFPGAN-style enhancement can help each detected face individually. In practice, this is why AI tools often do better on family photos and event shots than a single global sharpen filter.
The easiest workflow is usually one careful pass
If you already use Photoshop or Lightroom, manual control can help when only one or two faces are mildly soft. But for casual users, the simplest route is often a browser-based workflow that combines cleanup, sharpening, face restoration, and upscaling in one place.
That is where a tool like PhotoSharpener can fit naturally. It is useful when you want to test a group photo quickly without building a full retouching workflow, especially if the image has a mix of softness, compression, and small faces.
The key is not stacking five tools because the preview looked exciting. One moderate pass usually looks more believable than a chain of aggressive edits.
How to judge the result without fooling yourself
Check faces one by one, not just the whole image
A restored group photo can look impressive from far away while still failing on the details that matter most.
After each pass, zoom in and check:
- pupils and eyelids
- hair edges near the forehead
- teeth and lip outlines
- glasses rims
- skin texture on the most important faces
If those details look clearer and still human, you are moving in the right direction. If they look waxy, painted, doubled, or strangely redrawn, the edit went too far.
Stop when the image looks believable
This is where many people ruin an otherwise successful rescue.
The strongest preview is not always the best result. A group photo should still look like the original scene, just cleaner and easier to read. If one person's face becomes unnaturally sharp compared with everyone else, or if skin starts looking synthetic, back off.
A useful rule: choose the version that looks like the same photo on a better day, not the version that looks most "AI enhanced."
What to do if only some faces can really be saved
Prioritize the people who matter most
Sometimes the whole group will not recover evenly, and that is okay.
If one or two people are the emotional focus of the photo, judge success by those faces first. A family photo can still be worth keeping or printing if the key people look natural and recognizable, even if the smallest background faces remain soft.
This is especially helpful in:
- wedding and event photos where the couple matters most
- family pictures where grandparents or children are the priority
- memorial or reunion photos where recognizability matters more than technical perfection
Use fallback options instead of overprocessing
When the image hits its limit, these moves usually work better than one more aggressive edit:
- crop tighter around the strongest area
- print smaller instead of forcing a poster-sized output
- keep the image for screen use if large print exposes too much softness
- process an important face separately if the tool keeps missing it
- preserve some softness if that version still looks more truthful
The Real-ESRGAN documentation also suggests a practical fix for tiny faces: upscale first without face enhancement, then try face enhancement on the larger result when the faces were too small to detect well in the original. That can help in borderline cases, though it still will not create real portrait detail where the source had almost none.
How to avoid blurry group photos next time
Keep people on a similar plane when you can
A lot of group softness happens because one row sits much closer to the camera than another. That pushes some people outside the sharpest part of the focus range.
If you can pose the photo again in the future, try to:
- keep heads closer to the same distance from the camera
- avoid very deep multi-row spacing
- tap or place focus on the middle of the group
- use more light so the camera does not struggle as much
Photography guides for group portraits repeatedly make the same point: once the rows spread too far apart, some faces will drop out of focus even if the center looks fine.
Give the camera an easier job
Group photos get blurry when the camera is forced into bad compromises. A few simple habits help:
- use brighter light when possible
- ask people to hold still for an extra beat
- take a short burst instead of trusting one frame
- avoid digital zoom in dim light
- clean the phone lens before important shots
If your everyday photo problem is broader than group shots, our main guide on making a blurry photo clear again walks through the full diagnosis and fix order.
FAQ
Can AI improve all the faces in a blurry group photo?
Often, yes, but not equally. Larger and clearer faces usually improve the most. Tiny back-row faces may only become a little cleaner or easier to recognize.
Why do some people in the group improve more than others?
Usually because they were closer to the camera, better lit, less blurred, or simply larger in the file. Group photos often contain different technical problems in different parts of the frame.
Should I sharpen or upscale a blurry group photo first?
Sharpen or deblur first, then upscale only if you still need more pixels. Upscaling first usually gives you a larger version of the same softness.
Can a badly blurred reunion or class photo still be worth restoring?
Yes. Even when every face does not become portrait-sharp, a restored version can still be much more readable, more identifiable, and more useful for sharing or printing at a modest size.